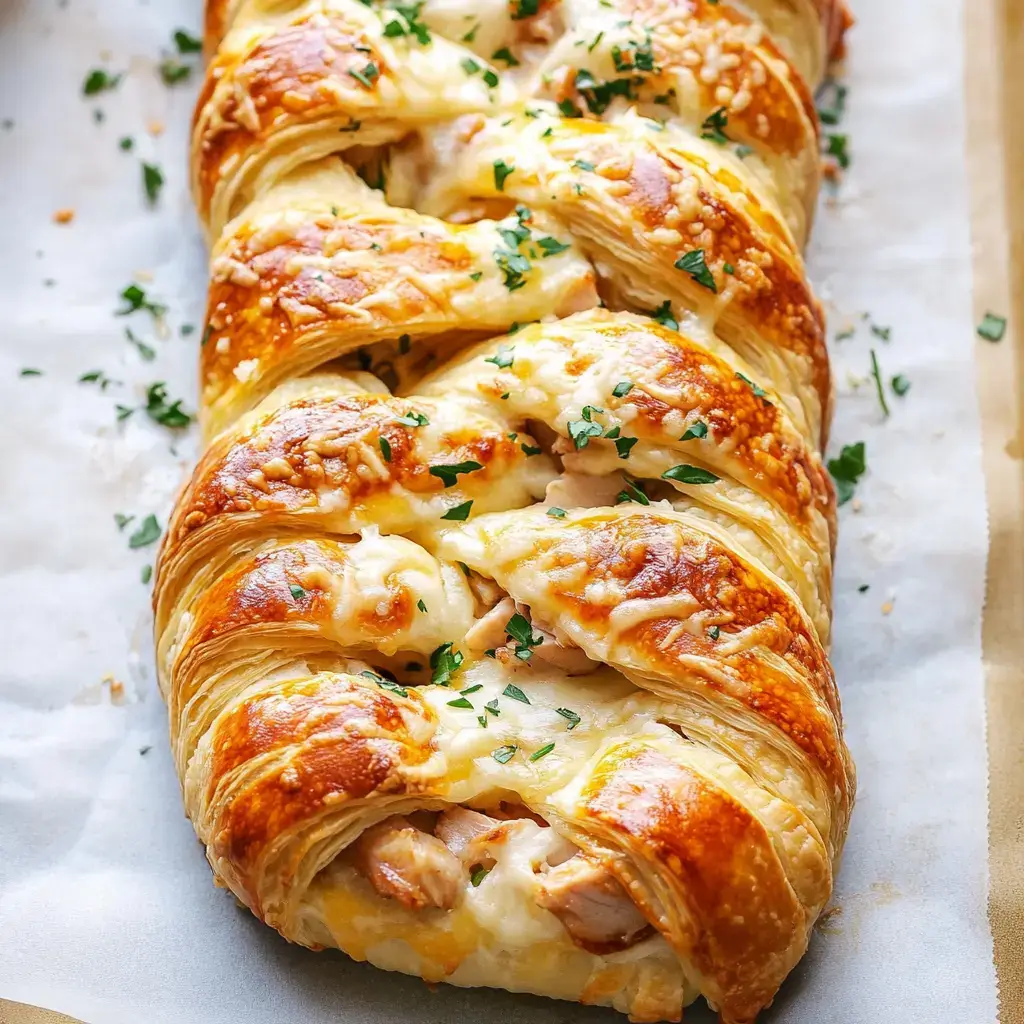

Appetizers are the perfect way to start any meal, setting the stage for the culinary experience to follow. If you’re looking for a crowd-pleasing dish that’s both easy to make and incredibly satisfying, look no further than the Appetizer Braid. This delightful creation combines the flaky goodness of puff pastry with savory fillings, making it the ultimate starter or snack for any occasion.
Ingredients
Creating this flavorful appetizer braid is simple and requires just a few key ingredients. Here’s what you’ll need:
- 1 3/4 cups sour cream
- 1 sheet puff pastry
- 6 slices turkey or chicken meat
- 10 slices cheese (such as cheddar or mozzarella)
- Fresh parsley, chopped
Instructions
Follow these easy steps to create your own appetizer braid:
- Preheat the Oven: Start by preheating your oven to 350°F (175°C). This ensures that your puff pastry bakes evenly and achieves a beautiful golden brown finish.
- Prepare the Puff Pastry: Roll out the puff pastry on a parchment-lined sheet pan. This prevents sticking and makes cleanup a breeze.
- Add the Sour Cream: Spread the sour cream evenly over the puff pastry. This adds a creamy texture and a tangy flavor that complements the other ingredients.
- Layer with Turkey or Chicken: Evenly distribute the turkey or chicken slices over the sour cream. This provides a hearty and savory component to the braid.
- Sprinkle with Parsley: Add a generous amount of chopped fresh parsley. This not only adds color but also enhances the flavor profile with a hint of freshness.
- Roll the Pastry: Carefully roll the pastry lengthwise into a tight log. This step is crucial for creating the braid structure.
- Cut Slits: Use kitchen scissors to cut slits down the length of the roll. Be sure not to cut all the way through; leave the base intact to hold the braid together.
- Create the Braid: Twist the cut segments to form a braid shape: pull one piece to the right, one to the left, and leave one in the center. Repeat this process until the entire roll is twisted into a braid.
- Bake: Place the braid in the preheated oven and bake for approximately 12 minutes, or until it becomes golden brown.
- Add Cheese: Once baked, melt the cheese and drizzle it over the top of the braid. This adds a gooey and indulgent finish.
- Serve and Enjoy: Pull apart the pieces and enjoy them, using the melted cheese as a delicious dip.
Nutrition Facts
Understanding the nutritional content of your food is important for maintaining a balanced diet. Here’s a breakdown of the nutrition facts per serving of this appetizer braid:
- Calories: Approximately 250
- Fat: 15g
- Carbohydrates: 20g
- Protein: 6g
How to Serve
The versatility of the appetizer braid makes it suitable for a wide array of occasions, each presenting unique opportunities to showcase this delicious dish. Here are some comprehensive suggestions on how to serve it, ensuring that it enhances the dining experience for your guests or family:
1. Party Starter
Serving the appetizer braid as a warm starter at gatherings or parties transforms it into a crowd favorite. The braided design not only adds an appealing visual element but also facilitates easy sharing, making it an ideal finger food for social settings. Here are a few ideas to elevate its presentation:
- Serving Style: Place the braid on a large, rustic wooden board or a decorative platter, allowing guests to pull apart the pieces with their hands. Accompany it with an assortment of dipping sauces—think marinara, garlic butter, or a tangy pesto—to enhance the flavor experience.
- Garnishing: Consider garnishing the dish with fresh herbs like parsley or basil for a pop of color. Adding some cherry tomatoes or olives around the braid can also create an inviting display.
- Themed Pairings: Tailor the accompaniments to fit the theme of your party. For a Mediterranean theme, serve alongside tzatziki or hummus. For a more traditional gathering, pair with a creamy ranch or a spicy buffalo sauce.
2. Brunch Delight
Transforming the appetizer braid into a delightful brunch option is an excellent way to incorporate it into a leisurely weekend meal. Here are some ideas for pairing and serving:
- Complementary Dishes: Serve the braid alongside a fresh, vibrant salad, such as a mixed greens salad with a citrus vinaigrette or a hearty Caesar salad. Alternatively, a comforting bowl of soup—like tomato basil or a creamy potato leek—pairs beautifully and rounds out the meal.
- Beverage Pairings: Enhance the brunch experience by pairing the meal with refreshing beverages. A mimosa, bellini, or a chilled glass of lemonade can elevate the gathering. For a non-alcoholic option, consider serving iced herbal teas or infused water with fresh fruits.
- Presentation: Arrange the braid on an elegant serving dish with a side of fresh fruit or yogurt to create a balanced plate. This not only adds visual appeal but also caters to different tastes and dietary preferences.
3. Snack Time
The appetizer braid excels as a standalone snack, making it a perfect option for satisfying hunger throughout the day. Here are some ways to enjoy it as a casual yet fulfilling snack:
- Quick and Easy: Simply warm the braid in the oven or microwave for a few minutes to enjoy it fresh. Its gooey fillings and flaky crust make for a deliciously comforting snack that can stave off hunger until the next meal.
- Portable Option: If you’re on the go, consider slicing the braid into smaller portions. These bite-sized pieces can be easily packed for lunches, picnics, or road trips, allowing you to enjoy a tasty treat anytime.
- Creative Variations: Experiment with different fillings depending on your mood or dietary needs. Consider a vegetarian option with spinach and feta or a meat-filled variant with pepperoni and mozzarella. These variations ensure that there’s always something new to try, keeping snack time exciting.
In summary, the appetizer braid’s adaptability makes it a charming and versatile dish that can be served in a multitude of ways, whether at a lively gathering, a relaxed brunch, or as a satisfying snack. By thoughtfully considering the presentation and pairings, you can elevate this dish and create memorable culinary experiences for yourself and your guests.
Additional Tips
Creating a delicious appetizer braid is not only about the ingredients you choose but also about the techniques you employ to ensure each element comes together seamlessly. To elevate your appetizer braid and guarantee its success every time, consider these comprehensive tips:
Puff Pastry Care
One of the key elements in achieving a light and flaky texture in your appetizer braid is the care of your puff pastry. Here are some detailed steps to follow:
- Keep It Chilled: Puff pastry is sensitive to temperature. Always keep it refrigerated until you are ready to work with it. The cold temperature helps maintain the integrity of the layers, which is crucial for that signature puff when baked. If the pastry becomes too warm, it can become difficult to handle and may not puff up properly in the oven.
- Thawing Properly: If you’re using frozen puff pastry, make sure to thaw it in the refrigerator overnight rather than at room temperature. This controlled thawing process preserves the texture and makes it easier to roll out without becoming sticky.
- Roll It Out: When rolling out your puff pastry, lightly flour your work surface and the rolling pin to prevent sticking. Aim for an even thickness of about 1/8 inch to ensure uniform baking. If the dough gets too warm while you roll it, pop it back in the fridge for a few minutes to firm up.
Variation in Fillings
One of the best aspects of an appetizer braid is its versatility. Here are some detailed ideas for fillings that can take your braid to the next level:
- Meat Options: For meat lovers, consider using a variety of cured meats such as prosciutto, pepperoni, or chorizo. You can also mix and match these meats for a more complex flavor profile. Experimenting with different textures, such as crispy bacon bits or tender shredded chicken, can add an exciting contrast.
- Vegetarian Alternatives: If you’re catering to a vegetarian audience, roasted vegetables like bell peppers, zucchini, or mushrooms work wonderfully. Marinating these vegetables beforehand can enhance their flavor. Adding ingredients like spinach or artichoke hearts can also create a delicious Mediterranean flair.
- Sweet Fillings: For a dessert twist, consider using sweet fillings such as Nutella, fruit preserves, or a cream cheese mixture with sugar and vanilla. This variation can transform your appetizer braid into a delightful treat for brunch or dessert.
Cheese Options
Cheese is a crucial component of your braid, contributing both flavor and texture. Here are some detailed cheese options to consider:
- Classic Choices: While cheddar and mozzarella are popular, you can elevate your dish by incorporating aged cheeses like Gruyère or aged Gouda. These cheeses melt beautifully and add a rich, nutty flavor that pairs well with many fillings.
- Gourmet Touch: For a more upscale version, consider using Brie or camembert. These soft cheeses melt wonderfully and provide a creamy texture that complements savory fillings. Goat cheese is another excellent option, offering a tangy flavor that pairs well with roasted vegetables or fresh herbs.
- Mix It Up: Don’t shy away from mixing different cheeses together. A blend of mozzarella and parmesan can create a delightful stretch and flavor, while adding a bit of blue cheese can introduce a bold contrast that some guests may appreciate.
Herb Variations
Herbs can significantly enhance the flavor of your appetizer braid. Here are some detailed suggestions for using herbs effectively:
- Beyond Parsley: While parsley is a classic herb choice, consider incorporating fresh thyme, which offers a subtle earthiness, or oregano, which brings a Mediterranean flair. Both of these herbs can elevate the overall taste and aroma of your appetizer.
- Fresh vs. Dried: When using herbs, fresh is often preferable for its vibrant flavor. However, if you only have dried herbs, remember that they are more concentrated, so use them sparingly. A general rule of thumb is to use one-third the amount of dried herbs as you would fresh.
- Herb Infusions: For an added layer of flavor, consider infusing your cheese or filling with herbs. For example, mixing fresh basil into a cream cheese filling can provide a fresh and aromatic contrast to savory ingredients.
Conclusion
By paying attention to the details of puff pastry care, experimenting with a variety of fillings, selecting the right cheeses, and incorporating flavorful herbs, you can create an appetizer braid that impresses your guests and delights their taste buds. With these tips, you’ll be well on your way to mastering this versatile dish and making it a regular feature at your gatherings.
FAQs
Q1: Can I prepare the appetizer braid in advance?
A1: Yes, you can assemble the braid ahead of time and refrigerate it. Bake it just before serving to ensure it’s fresh and warm.
Q2: What can I use instead of puff pastry?
A2: If puff pastry is unavailable, you can use crescent roll dough as an alternative. It offers a similar texture and flavor.
Q3: How do I store leftovers?
A3: Store any leftovers in an airtight container in the refrigerator. Reheat in the oven for a few minutes before serving to restore crispiness.
Q4: Can I freeze the appetizer braid?
A4: Yes, you can freeze the unbaked braid. Wrap it tightly in plastic wrap and aluminum foil before freezing. Bake directly from frozen, adding a few extra minutes to the baking time.
Conclusion
The Appetizer Braid is a versatile and visually appealing dish that strikes a harmonious balance between simplicity and elegance. Whether you’re planning a gathering, celebrating a special occasion, or just treating yourself to a flavorful snack, this dish is guaranteed to be a hit. Its combination of flaky puff pastry, savory fillings, and gooey melted cheese offers a culinary experience that satisfies both the palate and the eye.
What sets the Appetizer Braid apart is its adaptability. The beauty of this recipe lies in its ability to accommodate a variety of ingredients, allowing you to experiment with flavors and textures. For example, you can choose classic fillings such as spinach and feta, ham and cheese, or roasted vegetables for a vegetarian option. Alternatively, you can venture into more exotic combinations, like caramelized onions and goat cheese, or chicken with a tangy barbecue sauce. The possibilities are virtually endless, making this dish a great choice for any occasion.
In addition to its customizability, the Appetizer Braid is surprisingly easy to prepare. Using pre-made puff pastry saves time without compromising quality, allowing even novice cooks to create a dish that looks and tastes gourmet. The process of braiding the pastry may seem intricate at first, but it’s straightforward once you get the hang of it. This step not only secures the fillings inside but also creates a beautiful presentation that’s sure to impress your guests. The golden, crispy crust that forms during baking adds a touch of sophistication, making the dish look as good as it tastes.
For those with dietary preferences or restrictions, the recipe is highly adaptable. Gluten-free puff pastry or plant-based cheese can be used without sacrificing flavor. By carefully selecting ingredients, you can create a dish that caters to vegans, vegetarians, or those with specific allergies, ensuring everyone at the table can enjoy this delightful treat.
Beyond its taste and appearance, the Appetizer Braid is also practical. It can be prepared ahead of time and baked when needed, making it ideal for busy hosts. Additionally, its finger-food format ensures easy serving and minimal cleanup, which is especially appreciated during events or casual gatherings.
In conclusion, the Appetizer Braid is more than just a recipe—it’s an invitation to get creative in the kitchen. Whether you’re sticking to a tried-and-true filling or experimenting with bold flavors, this dish offers a fun and rewarding cooking experience. So, gather your favorite ingredients, unleash your creativity, and let the Appetizer Braid add a touch of flavor and flair to your next meal or event. With its irresistible combination of taste, texture, and visual appeal, it’s bound to become a favorite in your culinary repertoire.
Print
Appetizer Braid
Ingredients
Creating this flavorful appetizer braid is simple and requires just a few key ingredients. Here’s what you’ll need:
- 1 3/4 cups sour cream
- 1 sheet puff pastry
- 6 slices turkey or chicken meat
- 10 slices cheese (such as cheddar or mozzarella)
- Fresh parsley, chopped
Instructions
Follow these easy steps to create your own appetizer braid:
- Preheat the Oven: Start by preheating your oven to 350°F (175°C). This ensures that your puff pastry bakes evenly and achieves a beautiful golden brown finish.
- Prepare the Puff Pastry: Roll out the puff pastry on a parchment-lined sheet pan. This prevents sticking and makes cleanup a breeze.
- Add the Sour Cream: Spread the sour cream evenly over the puff pastry. This adds a creamy texture and a tangy flavor that complements the other ingredients.
- Layer with Turkey or Chicken: Evenly distribute the turkey or chicken slices over the sour cream. This provides a hearty and savory component to the braid.
- Sprinkle with Parsley: Add a generous amount of chopped fresh parsley. This not only adds color but also enhances the flavor profile with a hint of freshness.
- Roll the Pastry: Carefully roll the pastry lengthwise into a tight log. This step is crucial for creating the braid structure.
- Cut Slits: Use kitchen scissors to cut slits down the length of the roll. Be sure not to cut all the way through; leave the base intact to hold the braid together.
- Create the Braid: Twist the cut segments to form a braid shape: pull one piece to the right, one to the left, and leave one in the center. Repeat this process until the entire roll is twisted into a braid.
- Bake: Place the braid in the preheated oven and bake for approximately 12 minutes, or until it becomes golden brown.
- Add Cheese: Once baked, melt the cheese and drizzle it over the top of the braid. This adds a gooey and indulgent finish.
- Serve and Enjoy: Pull apart the pieces and enjoy them, using the melted cheese as a delicious dip.
Nutrition
- Serving Size: one normal portion
- Calories: 250
- Fat: 15g
- Carbohydrates: 20g
- Protein: 6g