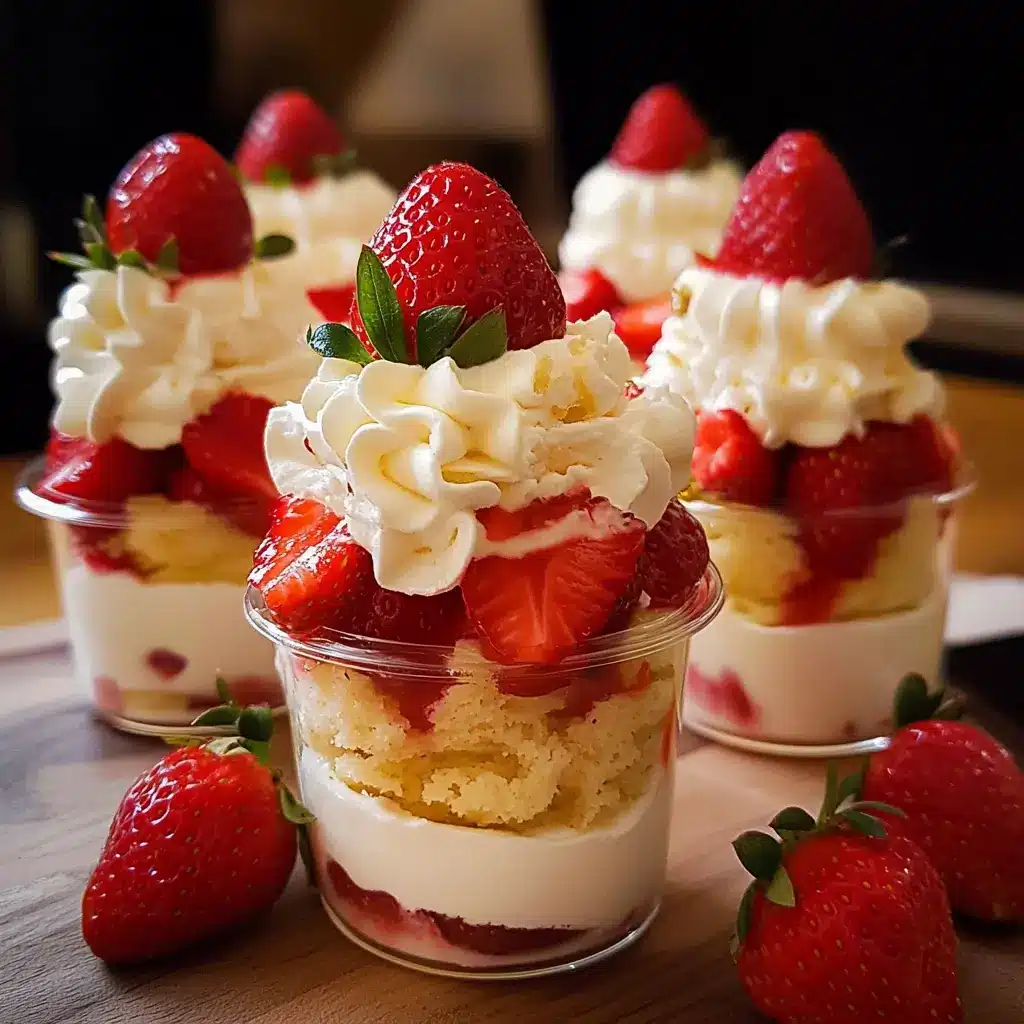

Okay, let’s dive into the delightful world of Strawberry Shortcake Cups! This recipe isn’t just a dessert in our household; it’s an event. The moment I announce I’m making these, a buzz of excitement fills the air. My kids adore the individual portions – they feel so special having their own little cup of sunshine. My partner, who usually leans towards chocolate desserts, makes an exception for these, praising the perfect balance of sweet berries, tender, buttery shortcake, and luscious cream. The beauty of this recipe is its simplicity masking an incredibly elegant and satisfying result. It’s become our go-to for spring gatherings, summer barbecues, and honestly, any time we crave a little handmade happiness. The aroma of the shortcakes baking, mingled with the sweet scent of macerating strawberries, is pure bliss. This isn’t just a recipe; it’s a memory-maker, and I’m thrilled to share our family-approved version with you.
Ingredients for Heavenly Strawberry Shortcake Cups
This recipe is designed for approximately 12 individual Strawberry Shortcake Cups. Ensure your ingredients are fresh for the best possible flavor and texture.
For the Shortcake Cups:
- 2 ½ cups (300g) All-Purpose Flour: The structural backbone of our tender shortcakes.
- ⅓ cup (67g) Granulated Sugar: Adds a gentle sweetness to the shortcake base.
- 1 tablespoon Baking Powder: The leavening agent that gives our shortcakes their delightful lift and airy texture.
- ½ teaspoon Salt: Balances the sweetness and enhances the overall flavor profile.
- ½ cup (113g) Unsalted Butter, cold and cubed: Crucial for creating those coveted flaky layers. Keep it very cold!
- 1 cup (240ml) Heavy Cream, cold (plus extra for brushing): Adds richness and moisture, contributing to a tender crumb.
- 1 Large Egg, lightly beaten: Binds the ingredients and adds to the richness.
- 1 teaspoon Vanilla Extract: Imparts a warm, aromatic flavor that complements the strawberries beautifully.
For the Strawberry Filling:
- 2 pounds (about 900g) Fresh Strawberries, hulled and sliced or quartered: The star of the show! Choose ripe, fragrant berries.
- ¼ to ½ cup (50-100g) Granulated Sugar (to taste): Draws out the juices from the strawberries and sweetens them. Adjust based on berry sweetness.
- 1 tablespoon Lemon Juice, freshly squeezed (optional): Brightens the flavor of the strawberries and adds a subtle tang.
For the Homemade Whipped Cream:
- 2 cups (480ml) Heavy Cream, very cold: The base for our light and airy whipped cream. Cold cream whips up best.
- ¼ cup (30g) Powdered Sugar (Confectioners’ Sugar), or to taste: Sweetens the cream and helps stabilize it.
- 1 teaspoon Vanilla Extract: Enhances the cream’s flavor, making it a perfect pairing for the fruit and cake.
Step-by-Step Instructions to Strawberry Shortcake Perfection
Follow these instructions carefully for perfectly crafted Strawberry Shortcake Cups every time.
1. Prepare the Strawberry Filling (Macerate the Strawberries):
* In a medium bowl, gently combine the hulled and sliced (or quartered) fresh strawberries with ¼ to ½ cup of granulated sugar (start with less, you can always add more) and the optional tablespoon of fresh lemon juice.
* Stir carefully to coat the strawberries.
* Cover the bowl and refrigerate for at least 30 minutes, or up to 2 hours. This process, called maceration, allows the sugar to draw out the natural juices from the strawberries, creating a luscious syrup.
2. Make the Shortcake Cups:
* Preheat & Prepare: Preheat your oven to 400°F (200°C). Grease and lightly flour a standard 12-cup muffin tin, or line with paper liners if preferred (though greasing often yields a better crust for shortcakes).
* Combine Dry Ingredients: In a large mixing bowl, whisk together the 2 ½ cups of all-purpose flour, ⅓ cup of granulated sugar, 1 tablespoon of baking powder, and ½ teaspoon of salt.
* Cut in the Butter: Add the ½ cup of cold, cubed unsalted butter to the dry ingredients. Using a pastry blender, your fingertips, or a food processor on pulse mode, cut the butter into the flour mixture until it resembles coarse crumbs with some pea-sized pieces of butter remaining. This is key for flakiness!
* Combine Wet Ingredients: In a separate small bowl, whisk together 1 cup of cold heavy cream, the lightly beaten large egg, and 1 teaspoon of vanilla extract.
* Form the Dough: Pour the wet ingredients into the dry ingredients. Stir gently with a fork or spatula until just combined. The dough will be shaggy and slightly sticky. Be careful not to overmix, as this can lead to tough shortcakes.
* Fill Muffin Cups: Divide the dough evenly among the 12 prepared muffin cups. An ice cream scoop can be helpful here for uniform portions. The cups will be about ¾ full.
* Optional Brush & Sprinkle: For a golden-brown top, lightly brush the tops of the dough with a little extra heavy cream and sprinkle with a pinch of granulated sugar, if desired.
* Bake: Bake for 15-20 minutes, or until the shortcakes are golden brown on top and a toothpick inserted into the center of one comes out clean.
* Cool: Let the shortcake cups cool in the muffin tin for about 5-10 minutes before carefully transferring them to a wire rack to cool completely. If they stick slightly, run a thin knife around the edges.
3. Prepare the Homemade Whipped Cream:
* Ensure your heavy cream, mixing bowl, and whisk (or beaters) are very cold. You can chill the bowl and whisk in the freezer for 10-15 minutes beforehand.
* Pour the 2 cups of very cold heavy cream into the chilled bowl.
* Add the ¼ cup of powdered sugar and 1 teaspoon of vanilla extract.
* Using an electric hand mixer or a stand mixer with the whisk attachment, beat the cream on medium-low speed, gradually increasing to medium-high.
* Continue beating until soft peaks form. Soft peaks will hold their shape momentarily but then gently droop. For slightly firmer peaks (medium peaks), continue beating for a little longer until the peaks hold their shape well but the tips still curl over. Be careful not to overbeat, or you’ll start making butter!
* Taste and add more powdered sugar if you prefer a sweeter cream.
* Cover and refrigerate the whipped cream until ready to assemble.
4. Assemble the Strawberry Shortcake Cups:
* Once the shortcake cups have cooled completely, take one cup.
* Option 1 (Hollow Out): You can gently scoop out a small portion from the center of the top of each shortcake cup to create more room for the filling.
* Option 2 (Slice): Alternatively, slice each shortcake cup horizontally in half, like a mini-burger bun.
* Spoon a generous amount of the macerated strawberries and their juice onto the bottom half of the shortcake (or into the hollowed-out center).
* Top with a dollop or pipe a swirl of the homemade whipped cream.
* If you sliced the shortcakes, place the top half back on. If you hollowed them, you can add another small dollop of cream and a strawberry slice on top for garnish.
* Repeat for all shortcake cups.
* Serve immediately for the best texture.
Nutrition Facts at a Glance
- Servings: This recipe yields approximately 12 individual Strawberry Shortcake Cups.
- Calories per Serving: Approximately 380-450 calories per cup (this can vary based on the exact amount of sugar used and the size of the shortcakes).
- Fat: A significant portion of calories comes from fat, primarily from the butter and heavy cream, contributing to the richness and tenderness.
- Carbohydrates: Primarily from the flour in the shortcakes and sugar in all components, providing energy.
- Sugar: Contains natural sugars from strawberries and added sugars for sweetness in the shortcakes, strawberry filling, and whipped cream. Adjust sugar levels to personal preference and the natural sweetness of your berries.
Disclaimer: Nutritional information is an estimate and can vary based on specific ingredients and portion sizes.
Understanding the Preparation Time
- Active Preparation Time: Approximately 30-40 minutes. This includes preparing the strawberries, mixing the shortcake dough, and whipping the cream.
- Maceration Time (Strawberries): Minimum 30 minutes (can be done while preparing other components or up to 2 hours ahead).
- Baking Time: 15-20 minutes for the shortcake cups.
- Cooling Time: At least 30-45 minutes for the shortcakes to cool completely before assembly.
- Total Time (Including inactive time): Approximately 1 hour 45 minutes to 2 hours 30 minutes. Many steps can be done concurrently or prepared slightly ahead to streamline the process.
How to Serve Your Strawberry Shortcake Cups
These individual delights offer versatility in presentation and enjoyment. Here are some ideas:
- Individual Dessert Plates:
- Serve each Strawberry Shortcake Cup on a small, elegant dessert plate.
- Garnish with a sprig of fresh mint for a pop of color.
- A light dusting of powdered sugar over the assembled cup can add a touch of sophistication.
- Dessert Bar/Buffet Style:
- Arrange the cooled shortcake cups, a bowl of macerated strawberries, and a bowl of whipped cream separately on a dessert table.
- Allow guests to assemble their own cups to their liking. This is interactive and caters to individual preferences for strawberry-to-cream ratios.
- Picnic or Potluck Perfect:
- Transport the components separately and assemble on-site for maximum freshness.
- The individual cup format makes them easy to serve and manage in outdoor settings.
- With a Scoop of Ice Cream:
- For an extra indulgent treat, serve the Strawberry Shortcake Cup alongside a small scoop of vanilla bean ice cream. The contrast of temperatures and textures is divine.
- Drizzle with Chocolate (A Decadent Twist):
- For chocolate lovers, a light drizzle of melted dark or milk chocolate over the whipped cream can add another layer of flavor.
- Layered in a Glass (Deconstructed Elegance):
- Crumble a shortcake cup into the bottom of a small glass or jar.
- Layer with strawberries and whipped cream.
- Repeat layers if the glass is tall enough, creating a mini trifle effect.
- Brunch Feature:
- These cups make a surprisingly delightful addition to a special brunch menu, offering a sweet counterpoint to savory dishes.
Additional Tips for Unforgettable Strawberry Shortcake Cups
- Cold is Key for Shortcakes: Ensure your butter and heavy cream are very cold when making the shortcake dough. Cold butter creates steam pockets as it melts during baking, resulting in flaky, tender layers. Cold cream also contributes to a better texture.
- Don’t Overmix the Dough: Mix the shortcake dough until just combined. Overmixing develops gluten, which can make your shortcakes tough and dense instead of light and tender. A shaggy, slightly sticky dough is perfect.
- Use the Best Quality Strawberries: Since strawberries are the star, opt for fresh, ripe, and fragrant berries. Local and in-season strawberries will always offer the best flavor. Taste your berries before adding sugar to the filling, so you can adjust sweetness accordingly.
- Proper Strawberry Maceration: Don’t skip the maceration step for the strawberries. This process not only sweetens the berries but also draws out their juices, creating a beautiful, natural syrup that soaks into the shortcake.
- Chill Your Whipping Tools: For the fluffiest whipped cream, chill your mixing bowl and whisk (or beaters) in the freezer for about 10-15 minutes before whipping the cream. Cold cream and cold tools help the cream whip up faster and achieve greater volume.
- Assemble Just Before Serving: For the best texture, assemble the Strawberry Shortcake Cups just before you plan to serve them. This prevents the shortcakes from becoming soggy from the strawberry juices and whipped cream. If you must assemble ahead, do so no more than an hour or two in advance and keep them refrigerated.
- Shortcake Flavor Boosters: Consider adding a teaspoon of lemon zest or orange zest to the dry ingredients for the shortcakes for an extra layer of citrusy brightness that complements the strawberries. A pinch of nutmeg or cardamom can also add a warm, interesting note.
- Customize Sweetness: Taste is subjective. Adjust the sugar in the strawberry filling and the whipped cream to your preference. Some strawberries are naturally sweeter than others, so a taste test is always a good idea.
Frequently Asked Questions (FAQ) About Strawberry Shortcake Cups
1. Can I use frozen strawberries for this recipe?
* Yes, you can use frozen strawberries, but fresh are highly recommended for the best texture and flavor. If using frozen, thaw them completely and drain any excess liquid very well before macerating. The texture of the berries will be softer than fresh ones. You might also need to adjust the sugar, as frozen berries can sometimes be tarter.
2. How can I make these Strawberry Shortcake Cups gluten-free?
* You can substitute the all-purpose flour with a good quality gluten-free all-purpose flour blend that includes xanthan gum (or add it if your blend doesn’t have it, according to package directions). The texture might be slightly different, but still delicious.
3. How long do Strawberry Shortcake Cups last? Can I make them ahead?
* Once assembled, Strawberry Shortcake Cups are best enjoyed within a few hours. The shortcakes will start to absorb moisture and become soggy over time.
* Make-Ahead Strategy: You can bake the shortcake cups a day in advance. Store them in an airtight container at room temperature. The strawberry filling can be made a day ahead and kept refrigerated. The whipped cream is best made fresh but can be made a few hours ahead and kept chilled. Assemble just before serving.
4. Can I use store-bought shortcakes or biscuits?
* Absolutely! If you’re short on time, store-bought dessert shells, angel food cake cups, or even sweet biscuits (like scones) can be a convenient substitute for the homemade shortcake cups. The overall experience will be different, but still enjoyable.
5. Why are my shortcakes tough or dense instead of light and flaky?
* The most common reasons are overmixing the dough or not using cold enough butter. Overmixing develops too much gluten. Butter needs to be cold and cut into the flour to create steam pockets for flakiness. Also, ensure your baking powder is fresh, as old baking powder won’t provide enough lift.
6. Can I make one large strawberry shortcake instead of individual cups?
* Yes, you can adapt this recipe. Instead of a muffin tin, you could press the dough into a round cake pan or drop larger spoonfuls onto a baking sheet to make individual traditional shortcakes. Adjust baking time accordingly (it will likely be longer for a single large cake).
7. Is it okay to use store-bought whipped cream or whipped topping?
* While homemade whipped cream is highly recommended for its superior flavor and texture, you can certainly use store-bought pressurized whipped cream or frozen whipped topping (thawed) in a pinch. Homemade allows you to control the sweetness and vanilla content.
8. What’s the best way to store leftover assembled Strawberry Shortcake Cups?
* If you have leftovers, cover them gently with plastic wrap (try not to let it touch the cream too much) or place them in an airtight container and refrigerate. They are best eaten within 24 hours, though the shortcake will soften considerably. It’s ideal to store components separately if possible and assemble as needed.