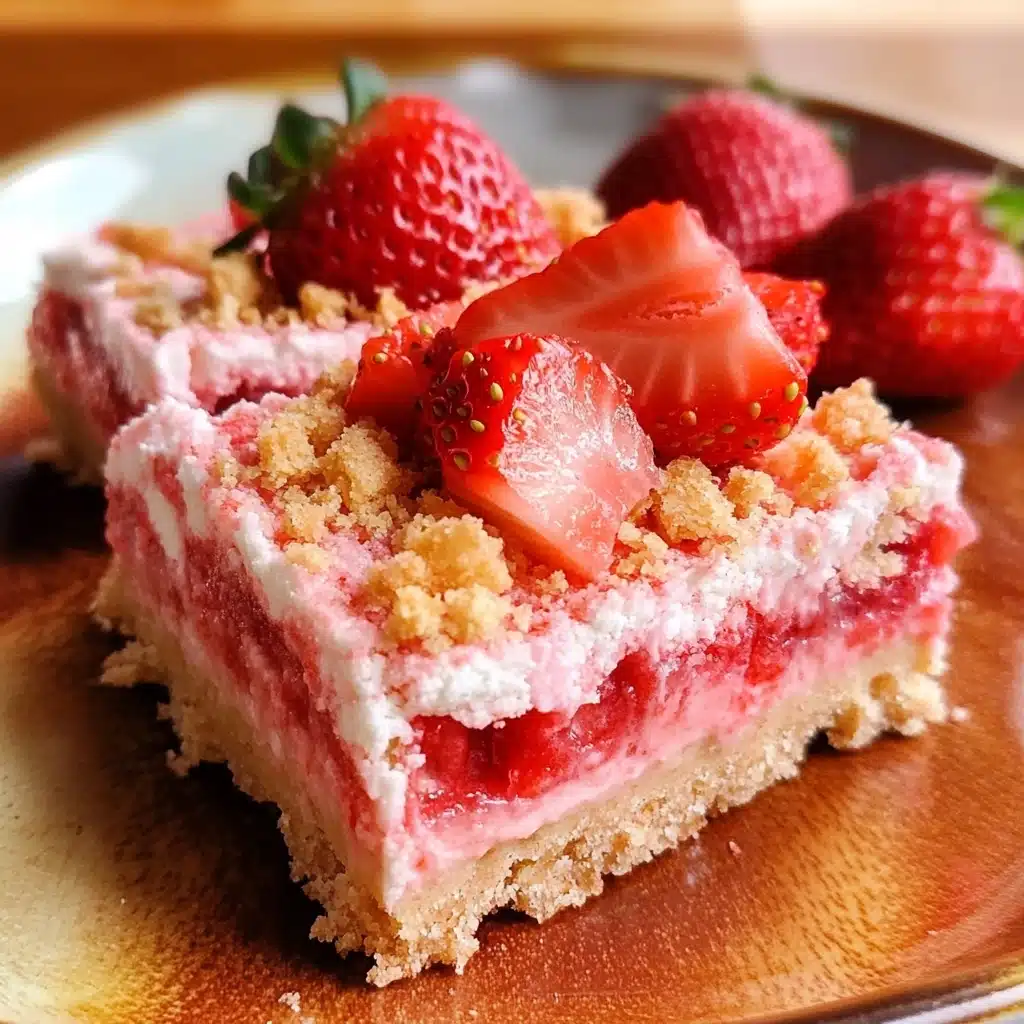

It’s funny how some of the best dessert discoveries happen unexpectedly. Last weekend, with the summer heat blazing and the oven feeling like a forbidden appliance, my family was craving something sweet but absolutely no-bake. After rummaging through the pantry and fridge, inspiration struck – strawberries were in season, and I had a box of graham crackers practically begging to be used. Enter these No-Bake Strawberry Shortcake Bars – a dessert that was not only incredibly easy to whip up but also became an instant family favorite. The layers of buttery graham cracker crust, creamy cheesecake filling, and juicy strawberry topping were a symphony of textures and flavors. Even my pickiest eater, who usually shies away from fruit desserts, devoured two bars! Honestly, these bars were so good and effortless, they’ve become my go-to for potlucks, summer gatherings, or just a simple sweet treat at home. If you’re looking for a dessert that screams summer, requires zero oven time, and tastes absolutely divine, you’ve just found your match. Get ready to fall in love with these No-Bake Strawberry Shortcake Bars – trust me, you won’t regret it!
Ingredients for No-Bake Strawberry Shortcake Bars
Here’s what you’ll need to create these delightful no-bake strawberry shortcake bars. Each ingredient plays a vital role in the overall flavor and texture, so let’s break it down:
- Graham Crackers: The foundation of our bars! You’ll need about 1 ½ cups of graham cracker crumbs. These provide a sweet, slightly nutty, and perfectly crumbly base that mimics the traditional shortcake texture. Pre-crushed graham cracker crumbs are convenient, but you can easily crush whole graham crackers yourself using a food processor or by placing them in a ziplock bag and rolling over them with a rolling pin.
- Unsalted Butter: Melted unsalted butter binds the graham cracker crumbs together to create the crust. Unsalted butter is preferred as it allows you to control the overall saltiness of the crust. The butter adds richness and helps the crust hold its shape beautifully.
- Granulated Sugar: A touch of granulated sugar in the graham cracker crust enhances its sweetness and helps it caramelize slightly as it chills, adding depth of flavor. It also helps balance the richness of the butter.
- Cream Cheese: The star of the creamy filling! You’ll need full-fat cream cheese for the best flavor and texture. Ensure your cream cheese is softened to room temperature before starting. This is crucial for a smooth, lump-free filling that blends perfectly with the other ingredients. Softened cream cheese creates a velvety texture that is irresistible.
- Powdered Sugar: Also known as confectioners’ sugar, powdered sugar sweetens the cream cheese filling while also helping to stabilize it and create a smooth, melt-in-your-mouth texture. Its fine consistency ensures it dissolves seamlessly into the cream cheese.
- Vanilla Extract: A splash of pure vanilla extract elevates the flavor of the cream cheese filling, adding warmth and complexity. Use high-quality vanilla extract for the best results. Vanilla complements the cream cheese and strawberry flavors beautifully.
- Heavy Cream: Heavy cream is essential for creating a light and airy texture in the cream cheese filling. When whipped, it adds volume and richness, making the filling incredibly luscious and decadent. Make sure your heavy cream is cold for optimal whipping.
- Fresh Strawberries: The heart of the strawberry shortcake! Fresh, ripe strawberries provide the vibrant flavor and juicy sweetness that makes these bars so irresistible. Choose bright red, fragrant strawberries for the best taste. Frozen strawberries are not recommended for the topping as they can become watery when thawed.
- Strawberry Jam or Preserves: Strawberry jam or preserves enhance the strawberry flavor and create a beautiful glaze for the topping. It adds sweetness and a glossy finish that makes the bars even more visually appealing. Choose a good quality jam or preserves with a rich strawberry flavor.
- Optional: Lemon Juice: A squeeze of fresh lemon juice can brighten the strawberry topping and balance the sweetness of the jam. It adds a subtle tartness that complements the strawberries perfectly and prevents the topping from being overly sweet.
Instructions for Making No-Bake Strawberry Shortcake Bars
Follow these step-by-step instructions to create your own batch of delightful No-Bake Strawberry Shortcake Bars. Each step is crucial for achieving the perfect texture and flavor, so take your time and enjoy the process!
Step 1: Prepare the Graham Cracker Crust
- Crush the Graham Crackers: If you’re starting with whole graham crackers, place them in a food processor and pulse until you have fine crumbs. Alternatively, place them in a large ziplock bag, seal it tightly, and use a rolling pin to crush them into fine crumbs. You should aim for about 1 ½ cups of graham cracker crumbs. The finer the crumbs, the smoother your crust will be.
- Melt the Butter: In a microwave-safe bowl or a small saucepan over low heat, melt the unsalted butter completely. Be careful not to overheat or burn the butter. Melted butter is essential for binding the crust together and providing that buttery flavor.
- Combine Crust Ingredients: In a medium-sized mixing bowl, combine the graham cracker crumbs, melted butter, and granulated sugar. Mix well with a fork or spatula until all the crumbs are evenly moistened and the mixture resembles damp sand. Ensure all the crumbs are coated with butter for a cohesive crust.
- Press into Pan: Line an 8×8 inch square baking pan with parchment paper, leaving an overhang on the sides for easy removal later. This parchment paper sling will be your best friend when it comes to lifting out the finished bars cleanly. Pour the graham cracker crumb mixture into the prepared pan. Using the bottom of a measuring cup or your fingers, firmly press the crumbs evenly into the bottom of the pan to create a compact and even crust. Make sure to press firmly to prevent the crust from being crumbly when you cut the bars.
- Chill the Crust: Place the pan with the crust in the refrigerator and chill for at least 30 minutes, or while you prepare the filling. Chilling allows the butter to solidify, firming up the crust and making it sturdy enough to hold the creamy filling. This step is crucial for preventing a soggy crust.
Step 2: Make the Creamy Cheesecake Filling
- Soften the Cream Cheese: Ensure your cream cheese is softened to room temperature. This is absolutely key for a smooth, lump-free filling. If it’s still cold, it will be difficult to blend properly and may result in a grainy texture. You can leave it at room temperature for about 30-60 minutes, or gently microwave it in short intervals, being careful not to melt it.
- Beat Cream Cheese and Powdered Sugar: In a large mixing bowl, using an electric mixer (hand mixer or stand mixer), beat the softened cream cheese and powdered sugar together until smooth, creamy, and completely combined. Start on low speed to prevent powdered sugar from flying everywhere, then increase to medium speed. Scrape down the sides of the bowl as needed to ensure everything is evenly mixed.
- Add Vanilla Extract: Pour in the vanilla extract to the cream cheese mixture and beat again until just combined. Vanilla extract enhances the flavor of the filling and adds a touch of warmth.
- Whip the Heavy Cream: In a separate clean, cold bowl, pour in the cold heavy cream. Using clean beaters, whip the heavy cream with an electric mixer until stiff peaks form. Stiff peaks mean that when you lift the beaters, the whipped cream holds its shape and stands up firmly. Be careful not to overwhip, or you’ll get butter! Cold heavy cream and a cold bowl are essential for whipping cream to stiff peaks.
- Gently Fold in Whipped Cream: Gradually fold the whipped cream into the cream cheese mixture in two or three additions. Use a rubber spatula and gently fold until just combined. Be careful not to overmix, as this can deflate the whipped cream and make the filling less airy. Folding preserves the airiness of the whipped cream, resulting in a light and fluffy filling.
Step 3: Assemble the Strawberry Shortcake Bars
- Spread Filling over Crust: Remove the chilled graham cracker crust from the refrigerator. Spoon the creamy cheesecake filling evenly over the prepared crust. Use an offset spatula or the back of a spoon to smooth the top of the filling for a neat presentation.
- Chill Again: Return the pan to the refrigerator and chill for at least 2-3 hours, or preferably overnight. This chilling time is essential for the filling to set completely and become firm enough to slice into bars. Patience is key here!
Step 4: Prepare the Strawberry Topping
- Wash and Slice Strawberries: While the bars are chilling, wash and hull the fresh strawberries. Slice them into thin slices or small pieces, depending on your preference. Smaller pieces will create a more even topping, while slices will give a more rustic look.
- Heat Strawberry Jam (Optional): In a small saucepan over low heat, gently warm the strawberry jam or preserves. This makes it easier to spread and creates a smoother glaze. You can also microwave it in short intervals if preferred. Warming the jam slightly loosens it up and makes it more spreadable.
- Combine Strawberries and Jam: In a medium bowl, gently toss the sliced strawberries with the warmed strawberry jam or preserves. If using, add a squeeze of fresh lemon juice to brighten the flavor. Coat the strawberries evenly with the jam. The jam acts as a glaze and enhances the strawberry flavor.
Step 5: Finish and Serve
- Top the Bars: Once the cheesecake filling is firm, remove the pan from the refrigerator. Spoon the strawberry topping evenly over the chilled cheesecake filling. Spread it gently to cover the entire surface.
- Chill Briefly (Optional): If you prefer a firmer strawberry topping, you can chill the bars for another 15-20 minutes after adding the topping. This is optional, but it can help the topping set slightly.
- Cut and Serve: Using the parchment paper overhang, carefully lift the bars out of the pan onto a cutting board. Cut them into squares or bars of your desired size. A sharp knife dipped in warm water will make clean cuts. Serve immediately and enjoy the refreshing taste of your No-Bake Strawberry Shortcake Bars!
- Store: Store any leftover bars in an airtight container in the refrigerator for up to 3-4 days. They are best enjoyed within the first 2-3 days for optimal freshness and texture.
Nutrition Facts for No-Bake Strawberry Shortcake Bars
(Per Serving, approximate values. Nutritional values can vary based on specific ingredients and serving size.)
- Serving Size: 1 bar (approximately 1/9th of an 8×8 inch pan)
- Calories: Approximately 350-400 calories per serving. This dessert is a treat, so enjoy it in moderation as part of a balanced diet. The calorie count is primarily from the graham cracker crust, cream cheese filling, and sugar content.
- Fat: Approximately 20-25 grams of fat per serving. The fat content comes mainly from the butter in the crust and the cream cheese and heavy cream in the filling. While some fat is necessary for flavor and texture, be mindful of portion sizes.
- Sugar: Approximately 30-35 grams of sugar per serving. This includes sugar from the graham crackers, granulated sugar, powdered sugar, and strawberry jam. Natural sugars are also present in the strawberries.
- Protein: Approximately 4-5 grams of protein per serving. Protein content is relatively low but contributes slightly from the dairy ingredients.
- Carbohydrates: Approximately 40-45 grams of carbohydrates per serving. Carbohydrates are primarily from the graham cracker crust, sugar, and strawberries.
Disclaimer: Nutritional information is an estimate and may vary. For precise nutritional values, use a nutrition calculator with specific ingredient brands.
Preparation Time for No-Bake Strawberry Shortcake Bars
The active preparation time for these No-Bake Strawberry Shortcake Bars is approximately 30-40 minutes. This includes crushing the graham crackers, making the crust, preparing the cream cheese filling, whipping the cream, and slicing the strawberries. However, the total time, including chilling, is significantly longer. You’ll need to factor in at least 3-4 hours of chilling time for the crust and filling to set properly, ideally overnight chilling is recommended for the best results. Therefore, while the hands-on time is quick and easy, plan ahead to allow for sufficient chilling time to achieve the perfect texture and enjoy these bars at their best. This makes them a great make-ahead dessert option for parties or gatherings.
How to Serve No-Bake Strawberry Shortcake Bars
These versatile No-Bake Strawberry Shortcake Bars can be served in various ways, making them perfect for any occasion. Here are some delightful serving suggestions:
- Classic Dessert:
- Serve them chilled straight from the refrigerator for a refreshing and cool treat, especially on a hot day.
- Cut them into neat squares or bars for easy handling and serving at parties or potlucks.
- They are perfect as a standalone dessert after a meal, offering a sweet and satisfying end to your dining experience.
- Elevated Dessert:
- With Whipped Cream: Add a dollop of freshly whipped cream or a swirl of store-bought whipped topping on top of each bar just before serving for an extra touch of indulgence.
- With Fresh Berries: Garnish with extra fresh strawberries, blueberries, or raspberries alongside the strawberry topping for a vibrant and colorful presentation and added berry goodness.
- With Mint: A sprig of fresh mint can add a touch of elegance and freshness, complementing the sweetness of the strawberries and cream cheese.
- With Chocolate Shavings: For chocolate lovers, a light dusting of chocolate shavings or mini chocolate chips can add a contrasting flavor and visual appeal.
- Summer Gatherings & Parties:
- These bars are ideal for picnics, BBQs, and summer parties as they are no-bake and travel well (keep them chilled).
- Their vibrant colors and delicious flavor make them a crowd-pleaser for any festive occasion.
- They are easy to eat without utensils, making them convenient for outdoor events or casual gatherings.
- Pairings:
- Coffee or Tea: Serve alongside a cup of hot coffee or iced tea for a delightful afternoon treat or after-dinner dessert.
- Milk: A glass of cold milk pairs perfectly with the creamy and fruity flavors of these bars, especially for kids.
- Dessert Wine: For a more sophisticated pairing, consider a light dessert wine like Moscato or a fruity rosé to complement the sweetness of the strawberry shortcake bars.
Additional Tips for Perfect No-Bake Strawberry Shortcake Bars
To ensure your No-Bake Strawberry Shortcake Bars are a resounding success, here are some valuable tips and tricks to keep in mind:
- Use Room Temperature Cream Cheese: This is crucial! Softened cream cheese blends seamlessly, creating a smooth and lump-free filling. If your cream cheese is cold, it will be difficult to mix and may result in a grainy texture. Plan ahead and let it soften at room temperature for at least 30-60 minutes.
- Don’t Overmix the Filling: Once you fold in the whipped cream, be gentle and fold just until combined. Overmixing can deflate the whipped cream and make the filling dense rather than light and airy. Preserve the airiness for the best texture.
- Chill Thoroughly: Patience is key! Ensure you chill the crust and then the assembled bars for the recommended time. This allows the butter in the crust to solidify and the cream cheese filling to set firmly, making the bars easier to cut and serve. Overnight chilling is highly recommended for optimal results.
- Use Fresh, Ripe Strawberries: The quality of your strawberries directly impacts the flavor of the bars. Choose fresh, ripe, and fragrant strawberries for the best taste. Avoid using bruised or overripe strawberries.
- Adjust Sweetness to Taste: If you prefer a less sweet dessert, you can reduce the amount of powdered sugar in the cream cheese filling. Taste the filling before chilling and adjust accordingly. Similarly, if your strawberries are very sweet, you may need less jam in the topping.
- Make Ahead Friendly: These bars are perfect for making ahead of time! You can prepare them up to 2-3 days in advance and store them in the refrigerator. This makes them an excellent choice for parties or busy schedules. The flavors even meld together more beautifully after a day or two.
- For a Smoother Crust: For an extra smooth graham cracker crust, you can finely grind the graham crackers in a food processor until they are almost like powder. This will create a very compact and less crumbly crust.
- Variations and Additions: Feel free to get creative!
- Different Crust: Try using Oreo crumbs or vanilla wafer crumbs for a different crust flavor.
- Other Berries: Substitute or mix in other berries like blueberries, raspberries, or blackberries for the topping.
- Lemon Zest: Add lemon zest to the cream cheese filling for a brighter, citrusy flavor.
- Chocolate Crust & Drizzle: For a richer version, use chocolate graham crackers for the crust and drizzle melted chocolate over the strawberry topping before chilling.
Frequently Asked Questions (FAQ) About No-Bake Strawberry Shortcake Bars
Here are some common questions and answers to help you make the perfect No-Bake Strawberry Shortcake Bars:
Q1: Can I use low-fat cream cheese or whipped topping to make these bars healthier?
A: While you can use low-fat cream cheese, keep in mind that it might affect the texture and richness of the filling. It may be slightly less creamy and firm. Whipped topping (like Cool Whip) can be used as a lighter alternative to heavy cream, but it will also change the texture and flavor of the filling, making it less dense and less rich. For the best results and classic cheesecake flavor, full-fat cream cheese and heavy cream are recommended.
Q2: Can I use frozen strawberries for the topping?
A: It’s not recommended to use frozen strawberries for the topping. Frozen strawberries tend to release a lot of water when thawed, which can make the topping watery and less appealing. Fresh strawberries provide the best flavor and texture for this recipe. If you must use frozen, thaw them completely and drain off as much excess liquid as possible before using.
Q3: How do I prevent the graham cracker crust from being crumbly?
A: The key to a non-crumbly graham cracker crust is to use enough melted butter and to press the crumbs firmly into the pan. Ensure all the graham cracker crumbs are evenly moistened with melted butter. Press the mixture firmly and evenly into the bottom of the pan using the bottom of a measuring cup or your fingers to create a compact base. Chilling the crust also helps it to firm up and become less crumbly.
Q4: Can I make these bars ahead of time?
A: Absolutely! No-Bake Strawberry Shortcake Bars are perfect for making ahead. In fact, they are even better after chilling overnight as the flavors meld together beautifully. You can prepare them up to 2-3 days in advance and store them in an airtight container in the refrigerator. Add the strawberry topping closer to serving time for the freshest appearance, although it can also be added in advance.
Q5: How long do these bars last in the refrigerator?
A: These bars will last in the refrigerator for up to 3-4 days when stored in an airtight container. They are best enjoyed within the first 2-3 days for optimal freshness and texture. After that, the graham cracker crust may start to soften slightly.
Q6: Can I freeze No-Bake Strawberry Shortcake Bars?
A: Freezing is not highly recommended for these bars. While they can be frozen, the texture of the cream cheese filling and strawberry topping might change upon thawing. The filling can become slightly grainy, and the strawberries may become softer. If you do freeze them, wrap them tightly in plastic wrap and then in foil, and thaw them in the refrigerator overnight.
Q7: My cream cheese filling is lumpy, what did I do wrong?
A: Lumpy cream cheese filling is usually caused by not using softened cream cheese. Make sure your cream cheese is fully softened to room temperature before you start mixing. If it’s still cold, it won’t blend smoothly. Beat the softened cream cheese well with the powdered sugar until it is completely smooth and creamy before adding the whipped cream.
Q8: Can I use a different size pan for this recipe?
A: This recipe is designed for an 8×8 inch square pan. If you use a larger pan (like a 9×13 inch), the bars will be thinner. You may need to adjust the baking time slightly if using a different size pan, but since this is a no-bake recipe, chilling time might be affected – they may set faster in a thinner layer. For best results, stick with the recommended 8×8 inch pan for the proportions given in the recipe.
Print
No-Bake Strawberry Shortcake Bars
Ingredients
Here’s what you’ll need to create these delightful no-bake strawberry shortcake bars. Each ingredient plays a vital role in the overall flavor and texture, so let’s break it down:
- Graham Crackers: The foundation of our bars! You’ll need about 1 ½ cups of graham cracker crumbs. These provide a sweet, slightly nutty, and perfectly crumbly base that mimics the traditional shortcake texture. Pre-crushed graham cracker crumbs are convenient, but you can easily crush whole graham crackers yourself using a food processor or by placing them in a ziplock bag and rolling over them with a rolling pin.
- Unsalted Butter: Melted unsalted butter binds the graham cracker crumbs together to create the crust. Unsalted butter is preferred as it allows you to control the overall saltiness of the crust. The butter adds richness and helps the crust hold its shape beautifully.
- Granulated Sugar: A touch of granulated sugar in the graham cracker crust enhances its sweetness and helps it caramelize slightly as it chills, adding depth of flavor. It also helps balance the richness of the butter.
- Cream Cheese: The star of the creamy filling! You’ll need full-fat cream cheese for the best flavor and texture. Ensure your cream cheese is softened to room temperature before starting. This is crucial for a smooth, lump-free filling that blends perfectly with the other ingredients. Softened cream cheese creates a velvety texture that is irresistible.
- Powdered Sugar: Also known as confectioners’ sugar, powdered sugar sweetens the cream cheese filling while also helping to stabilize it and create a smooth, melt-in-your-mouth texture. Its fine consistency ensures it dissolves seamlessly into the cream cheese.
- Vanilla Extract: A splash of pure vanilla extract elevates the flavor of the cream cheese filling, adding warmth and complexity. Use high-quality vanilla extract for the best results. Vanilla complements the cream cheese and strawberry flavors beautifully.
- Heavy Cream: Heavy cream is essential for creating a light and airy texture in the cream cheese filling. When whipped, it adds volume and richness, making the filling incredibly luscious and decadent. Make sure your heavy cream is cold for optimal whipping.
- Fresh Strawberries: The heart of the strawberry shortcake! Fresh, ripe strawberries provide the vibrant flavor and juicy sweetness that makes these bars so irresistible. Choose bright red, fragrant strawberries for the best taste. Frozen strawberries are not recommended for the topping as they can become watery when thawed.
- Strawberry Jam or Preserves: Strawberry jam or preserves enhance the strawberry flavor and create a beautiful glaze for the topping. It adds sweetness and a glossy finish that makes the bars even more visually appealing. Choose a good quality jam or preserves with a rich strawberry flavor.
- Optional: Lemon Juice: A squeeze of fresh lemon juice can brighten the strawberry topping and balance the sweetness of the jam. It adds a subtle tartness that complements the strawberries perfectly and prevents the topping from being overly sweet.
Instructions
Follow these step-by-step instructions to create your own batch of delightful No-Bake Strawberry Shortcake Bars. Each step is crucial for achieving the perfect texture and flavor, so take your time and enjoy the process!
Step 1: Prepare the Graham Cracker Crust
- Crush the Graham Crackers: If you’re starting with whole graham crackers, place them in a food processor and pulse until you have fine crumbs. Alternatively, place them in a large ziplock bag, seal it tightly, and use a rolling pin to crush them into fine crumbs. You should aim for about 1 ½ cups of graham cracker crumbs. The finer the crumbs, the smoother your crust will be.
- Melt the Butter: In a microwave-safe bowl or a small saucepan over low heat, melt the unsalted butter completely. Be careful not to overheat or burn the butter. Melted butter is essential for binding the crust together and providing that buttery flavor.
- Combine Crust Ingredients: In a medium-sized mixing bowl, combine the graham cracker crumbs, melted butter, and granulated sugar. Mix well with a fork or spatula until all the crumbs are evenly moistened and the mixture resembles damp sand. Ensure all the crumbs are coated with butter for a cohesive crust.
- Press into Pan: Line an 8×8 inch square baking pan with parchment paper, leaving an overhang on the sides for easy removal later. This parchment paper sling will be your best friend when it comes to lifting out the finished bars cleanly. Pour the graham cracker crumb mixture into the prepared pan. Using the bottom of a measuring cup or your fingers, firmly press the crumbs evenly into the bottom of the pan to create a compact and even crust. Make sure to press firmly to prevent the crust from being crumbly when you cut the bars.
- Chill the Crust: Place the pan with the crust in the refrigerator and chill for at least 30 minutes, or while you prepare the filling. Chilling allows the butter to solidify, firming up the crust and making it sturdy enough to hold the creamy filling. This step is crucial for preventing a soggy crust.
Step 2: Make the Creamy Cheesecake Filling
- Soften the Cream Cheese: Ensure your cream cheese is softened to room temperature. This is absolutely key for a smooth, lump-free filling. If it’s still cold, it will be difficult to blend properly and may result in a grainy texture. You can leave it at room temperature for about 30-60 minutes, or gently microwave it in short intervals, being careful not to melt it.
- Beat Cream Cheese and Powdered Sugar: In a large mixing bowl, using an electric mixer (hand mixer or stand mixer), beat the softened cream cheese and powdered sugar together until smooth, creamy, and completely combined. Start on low speed to prevent powdered sugar from flying everywhere, then increase to medium speed. Scrape down the sides of the bowl as needed to ensure everything is evenly mixed.
- Add Vanilla Extract: Pour in the vanilla extract to the cream cheese mixture and beat again until just combined. Vanilla extract enhances the flavor of the filling and adds a touch of warmth.
- Whip the Heavy Cream: In a separate clean, cold bowl, pour in the cold heavy cream. Using clean beaters, whip the heavy cream with an electric mixer until stiff peaks form. Stiff peaks mean that when you lift the beaters, the whipped cream holds its shape and stands up firmly. Be careful not to overwhip, or you’ll get butter! Cold heavy cream and a cold bowl are essential for whipping cream to stiff peaks.
- Gently Fold in Whipped Cream: Gradually fold the whipped cream into the cream cheese mixture in two or three additions. Use a rubber spatula and gently fold until just combined. Be careful not to overmix, as this can deflate the whipped cream and make the filling less airy. Folding preserves the airiness of the whipped cream, resulting in a light and fluffy filling.
Step 3: Assemble the Strawberry Shortcake Bars
- Spread Filling over Crust: Remove the chilled graham cracker crust from the refrigerator. Spoon the creamy cheesecake filling evenly over the prepared crust. Use an offset spatula or the back of a spoon to smooth the top of the filling for a neat presentation.
- Chill Again: Return the pan to the refrigerator and chill for at least 2-3 hours, or preferably overnight. This chilling time is essential for the filling to set completely and become firm enough to slice into bars. Patience is key here!
Step 4: Prepare the Strawberry Topping
- Wash and Slice Strawberries: While the bars are chilling, wash and hull the fresh strawberries. Slice them into thin slices or small pieces, depending on your preference. Smaller pieces will create a more even topping, while slices will give a more rustic look.
- Heat Strawberry Jam (Optional): In a small saucepan over low heat, gently warm the strawberry jam or preserves. This makes it easier to spread and creates a smoother glaze. You can also microwave it in short intervals if preferred. Warming the jam slightly loosens it up and makes it more spreadable.
- Combine Strawberries and Jam: In a medium bowl, gently toss the sliced strawberries with the warmed strawberry jam or preserves. If using, add a squeeze of fresh lemon juice to brighten the flavor. Coat the strawberries evenly with the jam. The jam acts as a glaze and enhances the strawberry flavor.
Step 5: Finish and Serve
- Top the Bars: Once the cheesecake filling is firm, remove the pan from the refrigerator. Spoon the strawberry topping evenly over the chilled cheesecake filling. Spread it gently to cover the entire surface.
- Chill Briefly (Optional): If you prefer a firmer strawberry topping, you can chill the bars for another 15-20 minutes after adding the topping. This is optional, but it can help the topping set slightly.
- Cut and Serve: Using the parchment paper overhang, carefully lift the bars out of the pan onto a cutting board. Cut them into squares or bars of your desired size. A sharp knife dipped in warm water will make clean cuts. Serve immediately and enjoy the refreshing taste of your No-Bake Strawberry Shortcake Bars!
- Store: Store any leftover bars in an airtight container in the refrigerator for up to 3-4 days. They are best enjoyed within the first 2-3 days for optimal freshness and texture.
Nutrition
- Serving Size: one normal portion
- Calories: 400
- Sugar: 35
- Fat: 25
- Carbohydrates: 45
- Protein: 5