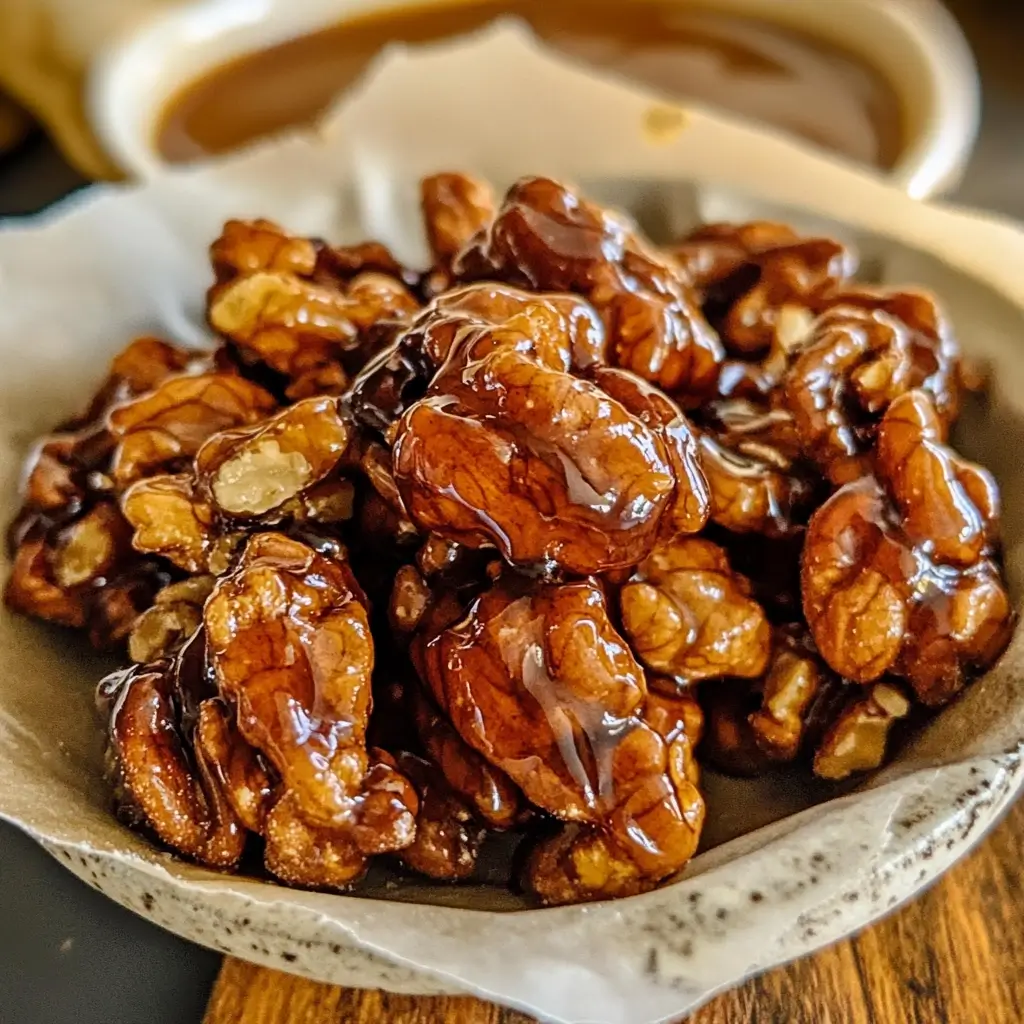

Oh, Maple Glazed Walnut Clusters. Where do I even begin? This isn’t just a recipe; it’s a symphony of textures and flavors that has become a beloved staple in our home. From holiday gatherings to impromptu movie nights, these crunchy, sweet clusters have a magical way of disappearing within minutes. I remember the first time I made them, the aroma of maple syrup and toasting walnuts filled the kitchen, instantly creating a cozy and inviting atmosphere. My kids, usually picky eaters, were hovering around the counter, their eyes wide with anticipation. And the taste? Pure bliss. The perfect balance of sweet maple glaze coating perfectly toasted walnuts, creating a satisfying crunch that gives way to a warm, nutty flavor. Honestly, these Maple Glazed Walnut Clusters are more than just a snack; they’re little bites of happiness that are guaranteed to bring smiles to faces, young and old. Get ready to experience a treat that’s not only incredibly easy to make but also utterly irresistible!
Ingredients You’ll Need to Create Maple Glazed Walnut Magic
To embark on your Maple Glazed Walnut Cluster adventure, gather these simple yet crucial ingredients. Each component plays a vital role in creating the perfect balance of sweetness, crunch, and nutty goodness.
- 3 cups Raw Walnut Halves or Pieces: (Approximately 12 ounces). Opt for raw walnuts for the best flavor and texture. Raw walnuts toast beautifully and offer a clean, nutty base for the maple glaze to cling to. You can use halves for a more elegant look or pieces for a rustic charm – both taste equally delicious!
- ½ cup Pure Maple Syrup: (120ml). This is the star of the show! Make sure to use pure maple syrup, not pancake syrup. Pure maple syrup provides a rich, authentic maple flavor and the perfect level of sweetness that is essential for these clusters. Its unique flavor profile is what truly elevates this recipe.
- ¼ cup Granulated Sugar: (50 grams). A touch of granulated sugar enhances the sweetness of the maple syrup and helps create a beautiful, slightly caramelized glaze. It also contributes to the lovely crispness of the clusters.
- 2 tablespoons Unsalted Butter: (30 grams). Butter adds richness, flavor, and a beautiful sheen to the glaze. It also helps bind the ingredients together and contributes to the overall melt-in-your-mouth texture. Unsalted butter allows you to control the salt content of the recipe.
- ½ teaspoon Vanilla Extract: (2.5ml). Vanilla extract enhances the overall flavor profile, adding a warm, aromatic depth that complements the maple and walnuts perfectly. It rounds out the sweetness and adds a touch of sophistication.
- ¼ teaspoon Salt: (1.5 grams). Salt is crucial for balancing the sweetness and enhancing all the flavors. It prevents the clusters from being overly sweet and brings out the natural nuttiness of the walnuts and the complexity of the maple syrup.
Step-by-Step Instructions for Perfect Maple Glazed Walnut Clusters
Creating these delightful Maple Glazed Walnut Clusters is surprisingly easy, even for novice bakers. Follow these simple, step-by-step instructions to achieve perfectly glazed, crunchy, and utterly delicious results every time.
Step 1: Preheat Your Oven and Prepare a Baking Sheet
Begin by preheating your oven to 325°F (160°C). This moderate temperature is ideal for toasting the walnuts and allowing the glaze to set without burning. Line a large baking sheet with parchment paper or a silicone baking mat. Parchment paper is highly recommended as it prevents sticking and makes cleanup a breeze. A silicone mat also works wonderfully and is reusable. Preparing your baking sheet in advance ensures you’re ready to spread the walnut clusters as soon as they are glazed.
Step 2: Toast the Walnuts (Optional but Highly Recommended)
While technically optional, toasting the walnuts before glazing them significantly enhances their flavor and texture. To toast the walnuts, spread them in a single layer on the prepared baking sheet. Bake in the preheated oven for 8-10 minutes, or until they become fragrant and slightly golden brown. Keep a close eye on them as they can burn quickly. Toasting releases the natural oils in the walnuts, deepening their nutty flavor and creating a more satisfying crunch that holds up beautifully in the glaze. Once toasted, remove them from the oven and let them cool slightly.
Step 3: Prepare the Maple Glaze
While the walnuts are toasting or cooling, it’s time to create the luscious maple glaze. In a medium saucepan, combine the pure maple syrup, granulated sugar, unsalted butter, vanilla extract, and salt. Place the saucepan over medium heat. Stir the mixture constantly with a spatula or wooden spoon until the butter is melted and the sugar is fully dissolved. Continue to cook the glaze, stirring occasionally, until it comes to a gentle simmer. Let it simmer for about 2-3 minutes, allowing the glaze to slightly thicken. Simmering helps to concentrate the flavors and create a glaze that will coat the walnuts beautifully. Be careful not to overcook the glaze, as it can become too thick and sticky.
Step 4: Combine Walnuts and Glaze
Remove the saucepan from the heat. Carefully pour the toasted (or raw) walnuts into the saucepan with the warm maple glaze. Using a spatula or wooden spoon, gently stir and fold the walnuts into the glaze, ensuring that they are evenly coated. Work quickly but gently to coat all the walnuts thoroughly. You want each walnut piece to be glistening with the sweet maple glaze.
Step 5: Spread the Walnut Clusters on the Baking Sheet
Using a spoon or your hands (be careful, they might be warm!), spread the glazed walnut mixture in a single layer onto the prepared baking sheet. Try to separate the walnuts into clusters rather than a solid mass. This will allow for even baking and create those desirable individual clusters. Don’t worry if they are touching slightly; they will separate more as they bake and cool.
Step 6: Bake the Walnut Clusters
Place the baking sheet with the glazed walnut clusters back into the preheated oven. Bake for 15-20 minutes, or until the glaze is bubbly and caramelized and the walnuts are a deep golden brown. Keep a close watch on them during the last few minutes of baking to prevent burning, especially around the edges. The baking time may vary slightly depending on your oven. You want the glaze to be set and slightly sticky but not burnt.
Step 7: Cool Completely and Break into Clusters
Once baked, remove the baking sheet from the oven and let the Maple Glazed Walnut Clusters cool completely on the baking sheet. This is crucial! As they cool, the glaze will harden and become deliciously crunchy. Do not attempt to break them apart while they are still warm, as they will be sticky and may not form proper clusters. Allow them to cool undisturbed for at least 30-45 minutes, or until they are completely cool and firm. Once fully cooled and hardened, gently break the large sheet of glazed walnuts into individual clusters of your desired size. They should easily snap apart into satisfyingly crunchy pieces.
Step 8: Store and Enjoy!
Once cooled and broken into clusters, your Maple Glazed Walnut Clusters are ready to be enjoyed! Store them in an airtight container at room temperature for up to a week. For longer storage, you can also freeze them in an airtight container for up to 2-3 months. However, they are so delicious, they are unlikely to last that long! Enjoy them as a snack, dessert, or as a delightful addition to cheese boards, salads, or yogurt parfaits.
Nutrition Facts: A Sweet Treat with a Nutritious Side
While Maple Glazed Walnut Clusters are undeniably a treat, they also offer some nutritional benefits, thanks to the walnuts themselves. Here’s a glimpse into the nutrition you can expect per serving (serving size is approximately ¼ cup of clusters, recipe yields about 12 servings):
- Calories: Approximately 180-220 calories per serving. This can vary slightly depending on the exact serving size and the amount of glaze coating each cluster. Enjoy in moderation as part of a balanced diet.
- Healthy Fats: Rich in Monounsaturated and Polyunsaturated Fats. Walnuts are an excellent source of healthy fats, particularly omega-3 fatty acids. These fats are beneficial for heart health, brain function, and reducing inflammation. They contribute to overall well-being when consumed as part of a balanced diet.
- Protein: A Good Source of Plant-Based Protein. Walnuts provide a decent amount of protein, contributing to satiety and muscle building. Protein is essential for various bodily functions and helps keep you feeling fuller for longer.
- Fiber: Contains Dietary Fiber. Walnuts are a good source of dietary fiber, which is important for digestive health, regulating blood sugar levels, and promoting feelings of fullness. Fiber aids in maintaining a healthy gut and contributes to overall wellness.
- Antioxidants: Packed with Antioxidants. Walnuts are rich in antioxidants, including vitamin E, melatonin, and polyphenols. Antioxidants help protect your body against damage from free radicals, which are linked to chronic diseases. These compounds contribute to cellular health and overall vitality.
Please note: These are estimated nutritional values and can vary. For precise nutritional information, refer to a nutritional database or calculator, considering the specific brands and measurements of ingredients used.
Preparation Time: Quick and Easy from Start to Finish
One of the best things about Maple Glazed Walnut Clusters is how quickly they come together. From gathering your ingredients to enjoying the finished product, the entire process is streamlined and efficient, making it perfect for busy schedules or last-minute cravings.
- Prep Time: Approximately 10-15 minutes. This includes gathering your ingredients, toasting the walnuts (if you choose to toast them), and preparing the maple glaze. The process is straightforward and requires minimal chopping or complex techniques.
- Cook Time: Approximately 15-20 minutes. Baking time in the oven allows the glaze to set and caramelize beautifully around the walnuts. The oven does most of the work during this time.
- Cooling Time: Approximately 30-45 minutes. While technically not active preparation time, cooling is crucial for the clusters to harden and achieve their signature crunch. This is mostly hands-off time while you can attend to other tasks.
- Total Time: Approximately 55-70 minutes. From start to finish, you can have a batch of delicious Maple Glazed Walnut Clusters ready in just over an hour. This includes toasting, glazing, baking, and cooling – a relatively short time for such a rewarding treat!
How to Serve Maple Glazed Walnut Clusters for Maximum Enjoyment
Maple Glazed Walnut Clusters are incredibly versatile and can be enjoyed in a multitude of ways. Their sweet and crunchy nature makes them a perfect addition to various occasions and culinary creations. Here are some delightful serving suggestions:
- Classic Snack: Simply enjoy them straight out of the container as a satisfying and delicious snack anytime of the day. They are perfect for curbing sweet cravings in a more wholesome way than processed candies.
- Holiday Treat: These clusters are a fantastic addition to holiday dessert platters and cookie exchanges. Their festive flavor profile and elegant appearance make them a crowd-pleaser during celebrations like Thanksgiving and Christmas.
- Party Appetizer: Serve them in small bowls at parties or gatherings as a sweet and crunchy appetizer. They pair wonderfully with cheese boards, fruit platters, and charcuterie, offering a delightful contrast in flavors and textures.
- Dessert Topping: Crush them and sprinkle them over ice cream, yogurt, pudding, or panna cotta for added sweetness and crunch. They elevate simple desserts to a gourmet level with minimal effort.
- Salad Garnish: Add a sprinkle of crumbled walnut clusters to salads for a surprising sweet and crunchy element. They complement leafy greens, fruit salads, and even savory salads with grilled chicken or vegetables, adding a delightful textural contrast.
- Breakfast Boost: Top your morning oatmeal, granola, or yogurt parfait with a few clusters for a touch of sweetness and healthy fats to start your day. They add a satisfying crunch and flavor to your breakfast routine.
- Gifting: Package them in pretty jars or bags tied with ribbon to create thoughtful homemade gifts for friends, family, or neighbors. They are a charming and delicious present, especially during the holiday season.
- Cheese Board Companion: Serve them alongside a cheese board featuring various cheeses, crackers, and fruits. The sweetness of the maple glaze complements both mild and sharp cheeses, creating a balanced and sophisticated flavor combination.
Additional Tips for Maple Glazed Walnut Cluster Perfection
To ensure your Maple Glazed Walnut Clusters turn out perfectly every time, consider these helpful tips and tricks. These insights will guide you towards achieving optimal flavor, texture, and overall success.
- Use High-Quality Maple Syrup: The quality of your maple syrup significantly impacts the flavor of these clusters. Opt for pure maple syrup, preferably Grade A Dark or Very Dark (formerly Grade B) for a richer, more robust maple flavor. Avoid pancake syrups or imitation maple syrups, as they lack the authentic taste and depth.
- Don’t Skip Toasting the Walnuts: While it’s an optional step, toasting the walnuts truly elevates the flavor. Toasting brings out their natural nuttiness and creates a more satisfying crunch that holds up beautifully in the glaze. It’s a small step that makes a big difference.
- Monitor the Glaze Simmering Time: Pay close attention to the glaze as it simmers. Simmering for the recommended time is crucial for thickening it slightly without overcooking. Overcooked glaze can become too thick and sticky, resulting in hard, overly sweet clusters.
- Spread Walnuts in a Single Layer: When baking, ensure the glazed walnuts are spread in a single layer on the baking sheet. This allows for even baking and caramelization. Overcrowding the pan can lead to uneven cooking and clusters that stick together too much.
- Don’t Overbake: Keep a close eye on the clusters during the last few minutes of baking to prevent burning. Overbaking can result in a bitter taste and overly hard clusters. They are ready when the glaze is bubbly and caramelized, and the walnuts are a deep golden brown.
- Cool Completely Before Breaking Apart: Resist the urge to break apart the clusters while they are still warm. Cooling is essential for the glaze to harden and create that signature crunchy texture. Allow them to cool undisturbed on the baking sheet until completely firm.
- Experiment with Spices: For an extra layer of flavor, consider adding a pinch of warm spices to the glaze, such as cinnamon, nutmeg, or cardamom. These spices complement the maple and walnut flavors beautifully, especially during the fall and winter months.
- Add a Touch of Sea Salt Flakes: After the clusters have cooled and you’ve broken them apart, sprinkle a few flakes of sea salt over the top. The subtle saltiness enhances the sweetness and adds a delightful savory-sweet contrast that elevates the overall flavor profile.
Frequently Asked Questions (FAQ) About Maple Glazed Walnut Clusters
Got questions about making Maple Glazed Walnut Clusters? We’ve compiled answers to some common queries to help you navigate the recipe with confidence and achieve perfect results every time.
Q1: Can I use pre-toasted walnuts?
A: Yes, you can use pre-toasted walnuts to save time. However, toasting raw walnuts yourself just before glazing them tends to yield a fresher and more intensely nutty flavor. If using pre-toasted, you may want to slightly reduce the baking time for the clusters to prevent them from becoming too dry.
Q2: Can I use a different type of nut instead of walnuts?
A: Absolutely! While this recipe is specifically for Maple Glazed Walnut Clusters, you can easily adapt it to other nuts like pecans, almonds, or even a mix of your favorites. The baking time might need slight adjustments depending on the nut type, so keep an eye on them while baking.
Q3: My glaze is too thin. What did I do wrong?
A: If your glaze is too thin, it could be due to not simmering it long enough. Ensure you simmer the glaze for the recommended 2-3 minutes after it reaches a gentle simmer. Also, using a lower quality or diluted maple syrup can result in a thinner glaze. Opt for pure, high-quality maple syrup for the best results.
Q4: My clusters are too sticky. How can I fix this?
A: Sticky clusters usually indicate they haven’t cooled completely. Ensure you allow them to cool undisturbed on the baking sheet until they are completely firm and hardened. If they are still sticky after cooling, it might be due to overcooking the glaze or humid weather conditions. Storing them in an airtight container with a piece of parchment paper between layers can help prevent sticking.
Q5: Can I make these clusters ahead of time?
A: Yes, Maple Glazed Walnut Clusters are perfect for making ahead! They store exceptionally well in an airtight container at room temperature for up to a week. This makes them ideal for party prep, holiday baking, or whenever you need a sweet treat ready to go.
Q6: Can I freeze Maple Glazed Walnut Clusters?
A: Yes, you can freeze them for longer storage. Place them in an airtight container or freezer bag, ensuring they are completely cooled. They can be frozen for up to 2-3 months. Thaw them at room temperature for about 30 minutes before serving. The texture might be slightly less crisp after freezing, but they will still be delicious.
Q7: Can I make a larger batch of this recipe?
A: Absolutely! You can easily double or triple the recipe to make a larger batch. Just ensure you use a larger saucepan for the glaze and spread the glazed walnuts in a single layer on multiple baking sheets if needed. Adjust baking time slightly if necessary.
Q8: Are Maple Glazed Walnut Clusters gluten-free and vegan?
A: Yes, this recipe as written is naturally gluten-free. To make it vegan, simply substitute the unsalted butter with a vegan butter alternative. Most pure maple syrups, walnuts, sugar, vanilla extract, and salt are naturally vegan and gluten-free, making this recipe easily adaptable for various dietary needs. Always double-check ingredient labels to ensure they meet your specific dietary requirements.