
Lemon Mousse Cups have become a staple dessert in our household, especially when the days get longer and the cravings for something light and zesty kick in. From the first spoonful, it was clear this recipe was a winner. The creamy, airy texture of the mousse, bursting with bright lemon flavor, is simply irresistible. My kids, who are usually chocolate fanatics, devoured these little cups of sunshine. Even my husband, who claims he’s ‘not a dessert person,’ went back for seconds. What I personally love most about these Lemon Mousse Cups is how effortlessly elegant they are. They require minimal effort yet deliver a sophisticated dessert experience that’s perfect for everything from a casual weeknight treat to a more formal spring brunch. If you’re searching for a dessert that’s both refreshingly delicious and incredibly easy to make, look no further – these Lemon Mousse Cups are guaranteed to become your new favorite.
Ingredients
- Heavy Cream: 2 cups (480ml), chilled. The foundation of our mousse, heavy cream whips up into luscious peaks, providing the airy and rich texture we’re after. Chilling it beforehand ensures it whips up perfectly.
- Granulated Sugar: ¾ cup (150g). Sweetens the mousse and balances the tartness of the lemon juice. Granulated sugar dissolves smoothly, creating a silky texture.
- Lemon Juice: ½ cup (120ml), freshly squeezed. The star of the show! Freshly squeezed lemon juice provides the vibrant, tangy flavor that defines lemon mousse. Avoid bottled juice for the best, freshest taste.
- Lemon Zest: 2 tablespoons, finely grated. Adds an extra layer of intense lemon flavor and aroma. Make sure to only zest the yellow part of the lemon peel, avoiding the bitter white pith underneath.
- Egg Yolks: 3 large. These add richness and stability to the mousse, contributing to its creamy texture and helping it set beautifully. Use fresh, good-quality eggs for the best results.
- Gelatin Powder: 1 tablespoon (about 7g), unflavored. An essential ingredient for stabilizing the mousse and giving it structure so it holds its shape in the cups. Unflavored gelatin ensures it doesn’t interfere with the lemon flavor.
- Cold Water: ¼ cup (60ml). Used to bloom the gelatin, which is crucial for activating its thickening properties. Cold water is essential for proper blooming.
- Pinch of Salt: Enhances the flavors and balances the sweetness and tartness. A small pinch of salt can make a big difference in the overall taste.
- Optional Garnishes: Fresh berries (raspberries, blueberries, strawberries), whipped cream, lemon slices, mint sprigs, lemon zest for decoration. These add visual appeal and complementary flavors to the finished mousse cups.
Instructions
- Bloom the Gelatin: In a small, microwave-safe bowl, sprinkle the gelatin powder over the cold water. Let it sit for 5-10 minutes. This process, called blooming, allows the gelatin granules to absorb the water and soften, which is essential for it to dissolve properly and thicken the mousse. You’ll notice the mixture becoming slightly thick and jelly-like.
- Heat the Lemon Juice and Sugar: In a medium saucepan, combine the granulated sugar and lemon juice. Heat over medium heat, stirring constantly until the sugar is completely dissolved and the mixture is just starting to simmer. Do not boil. Heating the lemon juice and sugar helps the sugar dissolve fully and creates a smooth base for the mousse. The slight heat also helps to gently cook the egg yolks in the next step.
- Temper the Egg Yolks: In a separate medium bowl, whisk the egg yolks lightly. Slowly drizzle about ¼ cup of the hot lemon-sugar mixture into the egg yolks while whisking constantly. This process, known as tempering, gradually raises the temperature of the egg yolks and prevents them from scrambling when added to the hot mixture. Whisk vigorously and continuously to ensure the yolks incorporate smoothly.
- Combine and Cook the Egg Yolk Mixture: Pour the tempered egg yolk mixture back into the saucepan with the remaining lemon-sugar mixture. Return the saucepan to medium-low heat and cook, stirring constantly, until the mixture thickens slightly and coats the back of a spoon. This should take about 3-5 minutes. It’s crucial to stir continuously and keep the heat low to prevent the eggs from scrambling. The mixture should thicken enough to leave a trail when you run your finger through it on the back of a spoon. Do not let it boil.
- Melt the Gelatin: Microwave the bloomed gelatin in short 10-second intervals until it is completely melted and liquid. Be careful not to overheat it, as this can reduce its thickening power. It should melt quickly and become clear.
- Incorporate Gelatin and Lemon Zest: Remove the saucepan from the heat and stir in the melted gelatin and lemon zest. Mix well until the gelatin is fully incorporated and the lemon zest is evenly distributed. The gelatin will help to set the mousse and the lemon zest adds a burst of fresh lemon aroma.
- Strain the Lemon Mixture (Optional but Recommended): For an ultra-smooth mousse, strain the lemon mixture through a fine-mesh sieve into a clean bowl. This step will remove any potential lumps or cooked egg bits, ensuring a perfectly silky texture. This step is particularly helpful if you are new to making mousse or want to guarantee a flawless result.
- Cool the Lemon Mixture: Let the lemon mixture cool to room temperature. It’s important to let it cool down before adding the whipped cream, otherwise, the heat might deflate the whipped cream and affect the mousse’s texture. This cooling process can take about 30-45 minutes. You can speed it up by placing the bowl in an ice bath, stirring occasionally, but be careful not to let it set too much.
- Whip the Heavy Cream: While the lemon mixture is cooling, place the chilled heavy cream in a large, clean bowl. Using an electric mixer (handheld or stand mixer), beat the heavy cream on medium-high speed until stiff peaks form. This means when you lift the beaters, the whipped cream holds its shape and stands up firmly. Be careful not to overwhip, or it can become grainy.
- Gently Fold in Whipped Cream: Once the lemon mixture is cooled and the heavy cream is whipped, gently fold the whipped cream into the cooled lemon mixture in three additions. Use a spatula and a figure-eight motion to fold, being careful not to deflate the whipped cream. This process should be done gently to maintain the airy texture of the whipped cream, which is crucial for a light and fluffy mousse.
- Portion into Cups: Divide the lemon mousse evenly among individual serving cups or glasses. You can use small dessert cups, wine glasses, or ramekins. Fill them almost to the top, leaving a little room for garnishes if desired.
- Chill to Set: Cover the mousse cups loosely with plastic wrap and refrigerate for at least 4 hours, or preferably overnight, to allow the mousse to set completely. Chilling allows the gelatin to work its magic and firm up the mousse to a perfect, spoonable consistency.
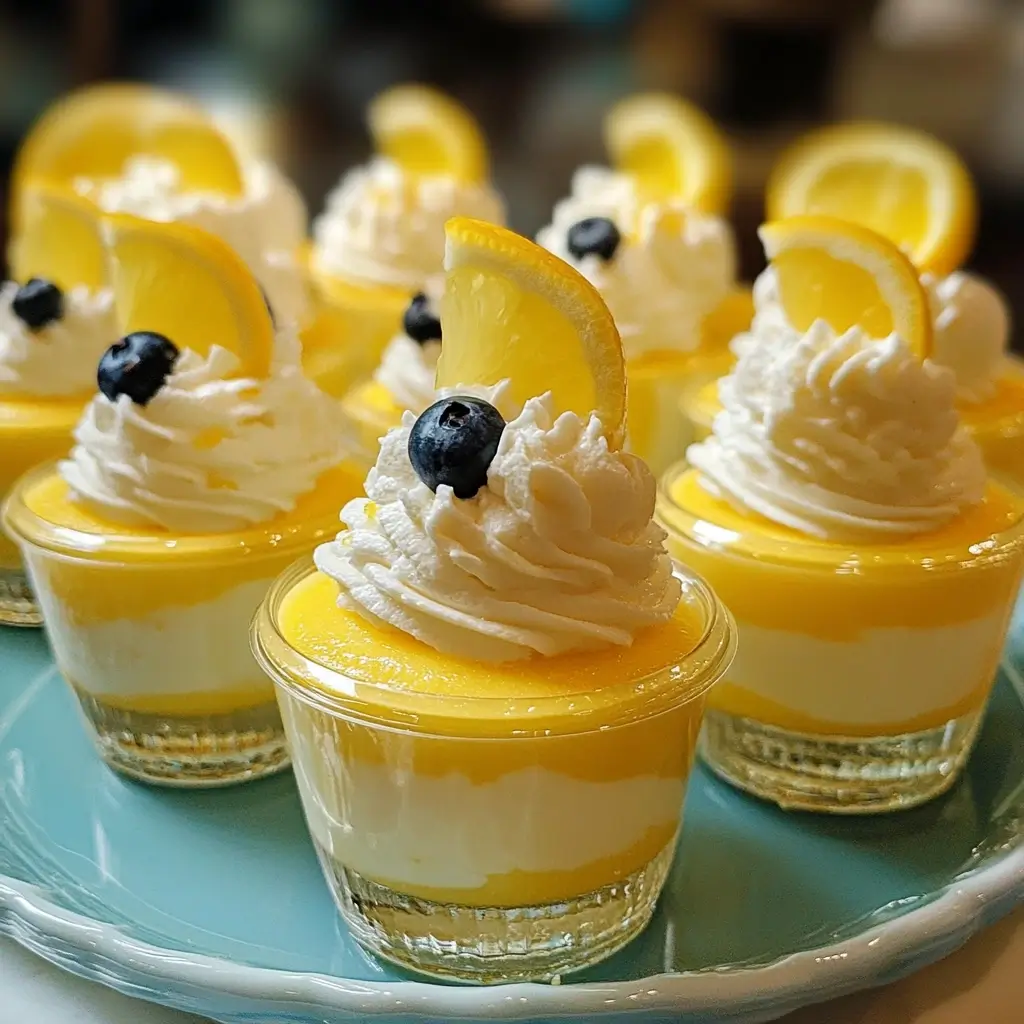
- Garnish and Serve: Before serving, garnish the Lemon Mousse Cups as desired. Some popular options include fresh berries (raspberries, blueberries, strawberries), a dollop of whipped cream, a thin slice of lemon, a sprig of fresh mint, or a sprinkle of lemon zest. Serve chilled and enjoy the refreshing burst of lemon flavor!
Nutrition Facts
(Per serving, assuming 6 servings – approximate values, may vary based on specific ingredients and portion sizes)
- Calories: Approximately 350 kcal. A moderate calorie count for a rich and creamy dessert.
- Fat: Approximately 28g. Primarily from the heavy cream and egg yolks, contributing to the creamy texture.
- Saturated Fat: Approximately 17g. From the heavy cream and egg yolks, something to be mindful of in a balanced diet.
- Cholesterol: Approximately 150mg. From the egg yolks, contributing to the richness and texture of the mousse.
- Sugar: Approximately 30g. From the granulated sugar, providing sweetness and balancing the lemon tartness.
Please note: These are estimated values and can vary based on the specific brands and types of ingredients used, as well as portion sizes. This information is intended as a general guide.
Preparation Time
- Prep Time: 30 minutes (includes blooming gelatin, making lemon mixture, and whipping cream)
- Chill Time: Minimum 4 hours (preferably overnight)
- Total Time: Approximately 4 hours 30 minutes (mostly inactive chilling time)
This Lemon Mousse Cups recipe is relatively quick to prepare, with most of the time spent waiting for the mousse to chill and set in the refrigerator. It’s a great make-ahead dessert, perfect for busy schedules or when you need to prepare for gatherings in advance.
How to Serve
Lemon Mousse Cups are incredibly versatile and can be served in numerous delightful ways. Here are some ideas to elevate your serving presentation and enhance the overall experience:
- Classic Elegance: Serve chilled in elegant dessert cups or small wine glasses. The clear glass showcases the light and airy texture of the mousse beautifully. Garnish with a simple sprig of mint and a delicate lemon twist for a sophisticated touch.
- Berry Bliss: Top each mousse cup with a generous handful of fresh mixed berries such as raspberries, blueberries, and strawberries. The tartness of the berries complements the lemon mousse perfectly, adding a burst of color and freshness.
- Whipped Cream Dream: A dollop of freshly whipped cream on top adds an extra layer of creamy indulgence. You can sweeten the whipped cream lightly with a touch of vanilla extract or powdered sugar for added flavor.
- Lemon Zest Sprinkle: For an intense lemon aroma and visual appeal, sprinkle finely grated lemon zest over the top of each mousse cup just before serving. The vibrant yellow zest adds a pop of color and enhances the lemon flavor.
- Cookie Crumbles: Add a textural contrast by sprinkling crushed lemon shortbread cookies or vanilla wafers on top of the mousse. The crunchy cookie crumbles provide a delightful bite alongside the smooth mousse.
- Chocolate Drizzle: For a surprising twist, drizzle a small amount of melted white chocolate or dark chocolate over the mousse cups. The chocolate adds a touch of richness and complexity that pairs surprisingly well with lemon.
- Layered Parfaits: Create layered parfaits by alternating layers of lemon mousse with layers of crushed cookies, fresh berries, or granola in taller glasses. This makes for a visually stunning and more substantial dessert.
- Festive Occasions: Decorate the mousse cups according to the occasion. For spring, use edible flowers or pastel-colored sprinkles. For summer, use tropical fruits like mango or passion fruit. For holidays, use themed sprinkles or chocolate shavings.
- Alongside Tea or Coffee: Lemon Mousse Cups are a perfect accompaniment to a cup of hot tea or coffee. The refreshing lemon flavor cleanses the palate and provides a delightful contrast to the warmth of the beverage.
- After Dinner Dessert: Serve as a light and refreshing dessert after a heavier meal. The airy texture and tangy lemon flavor are a welcome change after rich dishes.
Additional Tips for Perfect Lemon Mousse Cups
To ensure your Lemon Mousse Cups are absolutely perfect every time, consider these helpful tips:
- Use Freshly Squeezed Lemon Juice: While bottled lemon juice is convenient, freshly squeezed lemon juice provides a significantly brighter and more vibrant flavor that is essential for a truly delicious lemon mousse. Avoid bottled juice for the best results.
- Zest the Lemons First: Zest the lemons before juicing them. It’s much easier to zest a whole lemon than a squeezed one! Make sure to only zest the yellow part of the peel, avoiding the bitter white pith underneath.
- Chill Everything: Ensure your heavy cream and mixing bowl are thoroughly chilled before whipping the cream. Cold cream whips up much more easily and to a greater volume, resulting in a lighter and airier mousse.
- Don’t Overwhip the Cream: Whip the heavy cream just until stiff peaks form. Overwhipped cream can become grainy and lose its smooth texture, affecting the final mousse consistency. Watch carefully and stop whipping as soon as stiff peaks appear.
- Cool the Lemon Mixture Completely: It’s crucial to let the lemon mixture cool down completely to room temperature before folding in the whipped cream. If the lemon mixture is still warm, it will melt the whipped cream and result in a runny or less airy mousse. Patience is key here!
- Fold Gently: When folding the whipped cream into the lemon mixture, be gentle and use a figure-eight motion. Overmixing will deflate the whipped cream and make the mousse dense. Fold just until the whipped cream is fully incorporated and the mixture is homogenous.
- Adjust Sweetness to Taste: Taste the lemon mixture before folding in the whipped cream and adjust the sugar if needed. If you prefer a tarter mousse, you can reduce the sugar slightly. If you like it sweeter, add a bit more sugar.
- Make Ahead of Time: Lemon Mousse Cups are an excellent make-ahead dessert. They can be prepared up to 2-3 days in advance and stored in the refrigerator. This makes them perfect for entertaining or for enjoying a stress-free dessert any time.
- For Vegan Option: While traditionally made with heavy cream and egg yolks, you can explore vegan versions using coconut cream and agar-agar instead of gelatin. Vegan versions might have slightly different texture but can still capture the delicious lemon flavor.
- Experiment with Flavors: While lemon is classic, feel free to experiment with other citrus fruits like lime, orange, or grapefruit to create different variations of citrus mousse cups. You can also add a touch of vanilla extract or almond extract for subtle flavor enhancements.
FAQ – Frequently Asked Questions About Lemon Mousse Cups
Q1: Can I use bottled lemon juice instead of fresh?
A: While you can use bottled lemon juice in a pinch, freshly squeezed lemon juice is highly recommended for the best flavor. Fresh lemon juice has a brighter, more vibrant, and less artificial taste compared to bottled juice, which can sometimes taste slightly metallic or flat. For the most delicious Lemon Mousse Cups, opt for fresh lemons.
Q2: Can I make these mousse cups ahead of time?
A: Absolutely! Lemon Mousse Cups are a fantastic make-ahead dessert. In fact, they benefit from chilling time to set properly. You can prepare them up to 2-3 days in advance and store them covered in the refrigerator. This makes them perfect for parties or when you want a dessert ready to go.
Q3: My mousse is not setting, what did I do wrong?
A: There are a few reasons why your mousse might not be setting. First, ensure you bloomed and melted the gelatin correctly. If the gelatin isn’t properly activated, it won’t thicken the mousse. Second, make sure you cooled the lemon mixture sufficiently before folding in the whipped cream. If it was too warm, it could prevent the gelatin from setting properly. Lastly, ensure you chilled the mousse for at least 4 hours, or preferably overnight, as it needs ample time to set in the refrigerator.
Q4: Can I double or halve this recipe?
A: Yes, this recipe can easily be doubled or halved to suit your needs. Simply adjust the ingredient quantities proportionally. For example, to double the recipe, multiply each ingredient amount by two. To halve it, divide each ingredient amount by two. Keep in mind that cooking times might remain similar, but chilling times will still be necessary.
Q5: Can I use a different type of sweetener?
A: While granulated sugar is recommended for this recipe for its clean sweetness and smooth dissolving properties, you could experiment with other sweeteners. Caster sugar (superfine sugar) works similarly to granulated sugar. Powdered sugar could be used but might make the mousse slightly denser. Liquid sweeteners like honey or maple syrup are not recommended as they can alter the texture and flavor profile significantly.
Q6: Can I make these mousse cups without gelatin?
A: Gelatin is the key ingredient that provides structure and sets the mousse. Without gelatin, the mousse will likely be too runny and not hold its shape. If you wish to avoid gelatin, you might consider using a vegetarian alternative like agar-agar, but this will require some adjustments to the recipe and might slightly alter the texture. For a no-gelatin lemon dessert, you might consider a lemon posset or lemon curd instead.
Q7: How long do Lemon Mousse Cups last in the refrigerator?
A: Properly stored Lemon Mousse Cups will last for about 3-4 days in the refrigerator. Ensure they are covered tightly with plastic wrap to prevent them from drying out or absorbing odors from the fridge. While they are best consumed within the first few days for optimal freshness and texture, they will still be safe to eat for up to 4 days.
Q8: Can I freeze Lemon Mousse Cups?
A: Freezing Lemon Mousse Cups is not recommended. Freezing and thawing can significantly alter the texture of the mousse, causing it to become grainy or watery as the whipped cream and gelatin structure breaks down. For the best texture and flavor, it’s best to enjoy Lemon Mousse Cups fresh or within a few days of making them and stored in the refrigerator.

Lemon Mousse Cups
Ingredients
- Heavy Cream: 2 cups (480ml), chilled. The foundation of our mousse, heavy cream whips up into luscious peaks, providing the airy and rich texture we’re after. Chilling it beforehand ensures it whips up perfectly.
- Granulated Sugar: ¾ cup (150g). Sweetens the mousse and balances the tartness of the lemon juice. Granulated sugar dissolves smoothly, creating a silky texture.
- Lemon Juice: ½ cup (120ml), freshly squeezed. The star of the show! Freshly squeezed lemon juice provides the vibrant, tangy flavor that defines lemon mousse. Avoid bottled juice for the best, freshest taste.
- Lemon Zest: 2 tablespoons, finely grated. Adds an extra layer of intense lemon flavor and aroma. Make sure to only zest the yellow part of the lemon peel, avoiding the bitter white pith underneath.
- Egg Yolks: 3 large. These add richness and stability to the mousse, contributing to its creamy texture and helping it set beautifully. Use fresh, good-quality eggs for the best results.
- Gelatin Powder: 1 tablespoon (about 7g), unflavored. An essential ingredient for stabilizing the mousse and giving it structure so it holds its shape in the cups. Unflavored gelatin ensures it doesn’t interfere with the lemon flavor.
- Cold Water: ¼ cup (60ml). Used to bloom the gelatin, which is crucial for activating its thickening properties. Cold water is essential for proper blooming.
- Pinch of Salt: Enhances the flavors and balances the sweetness and tartness. A small pinch of salt can make a big difference in the overall taste.
- Optional Garnishes: Fresh berries (raspberries, blueberries, strawberries), whipped cream, lemon slices, mint sprigs, lemon zest for decoration. These add visual appeal and complementary flavors to the finished mousse cups.
Instructions
- Bloom the Gelatin: In a small, microwave-safe bowl, sprinkle the gelatin powder over the cold water. Let it sit for 5-10 minutes. This process, called blooming, allows the gelatin granules to absorb the water and soften, which is essential for it to dissolve properly and thicken the mousse. You’ll notice the mixture becoming slightly thick and jelly-like.
- Heat the Lemon Juice and Sugar: In a medium saucepan, combine the granulated sugar and lemon juice. Heat over medium heat, stirring constantly until the sugar is completely dissolved and the mixture is just starting to simmer. Do not boil. Heating the lemon juice and sugar helps the sugar dissolve fully and creates a smooth base for the mousse. The slight heat also helps to gently cook the egg yolks in the next step.
- Temper the Egg Yolks: In a separate medium bowl, whisk the egg yolks lightly. Slowly drizzle about ¼ cup of the hot lemon-sugar mixture into the egg yolks while whisking constantly. This process, known as tempering, gradually raises the temperature of the egg yolks and prevents them from scrambling when added to the hot mixture. Whisk vigorously and continuously to ensure the yolks incorporate smoothly.
- Combine and Cook the Egg Yolk Mixture: Pour the tempered egg yolk mixture back into the saucepan with the remaining lemon-sugar mixture. Return the saucepan to medium-low heat and cook, stirring constantly, until the mixture thickens slightly and coats the back of a spoon. This should take about 3-5 minutes. It’s crucial to stir continuously and keep the heat low to prevent the eggs from scrambling. The mixture should thicken enough to leave a trail when you run your finger through it on the back of a spoon. Do not let it boil.
- Melt the Gelatin: Microwave the bloomed gelatin in short 10-second intervals until it is completely melted and liquid. Be careful not to overheat it, as this can reduce its thickening power. It should melt quickly and become clear.
- Incorporate Gelatin and Lemon Zest: Remove the saucepan from the heat and stir in the melted gelatin and lemon zest. Mix well until the gelatin is fully incorporated and the lemon zest is evenly distributed. The gelatin will help to set the mousse and the lemon zest adds a burst of fresh lemon aroma.
- Strain the Lemon Mixture (Optional but Recommended): For an ultra-smooth mousse, strain the lemon mixture through a fine-mesh sieve into a clean bowl. This step will remove any potential lumps or cooked egg bits, ensuring a perfectly silky texture. This step is particularly helpful if you are new to making mousse or want to guarantee a flawless result.
- Cool the Lemon Mixture: Let the lemon mixture cool to room temperature. It’s important to let it cool down before adding the whipped cream, otherwise, the heat might deflate the whipped cream and affect the mousse’s texture. This cooling process can take about 30-45 minutes. You can speed it up by placing the bowl in an ice bath, stirring occasionally, but be careful not to let it set too much.
- Whip the Heavy Cream: While the lemon mixture is cooling, place the chilled heavy cream in a large, clean bowl. Using an electric mixer (handheld or stand mixer), beat the heavy cream on medium-high speed until stiff peaks form. This means when you lift the beaters, the whipped cream holds its shape and stands up firmly. Be careful not to overwhip, or it can become grainy.
- Gently Fold in Whipped Cream: Once the lemon mixture is cooled and the heavy cream is whipped, gently fold the whipped cream into the cooled lemon mixture in three additions. Use a spatula and a figure-eight motion to fold, being careful not to deflate the whipped cream. This process should be done gently to maintain the airy texture of the whipped cream, which is crucial for a light and fluffy mousse.
- Portion into Cups: Divide the lemon mousse evenly among individual serving cups or glasses. You can use small dessert cups, wine glasses, or ramekins. Fill them almost to the top, leaving a little room for garnishes if desired.
- Chill to Set: Cover the mousse cups loosely with plastic wrap and refrigerate for at least 4 hours, or preferably overnight, to allow the mousse to set completely. Chilling allows the gelatin to work its magic and firm up the mousse to a perfect, spoonable consistency.
- Garnish and Serve: Before serving, garnish the Lemon Mousse Cups as desired. Some popular options include fresh berries (raspberries, blueberries, strawberries), a dollop of whipped cream, a thin slice of lemon, a sprig of fresh mint, or a sprinkle of lemon zest. Serve chilled and enjoy the refreshing burst of lemon flavor!
Nutrition
- Serving Size: one normal portion
- Calories: 350
- Sugar: 30g
- Fat: 28g
- Saturated Fat: 17g
- Cholesterol: 150mg