Ingredients
This Honey Soy Glazed Chicken recipe is surprisingly simple, relying on pantry staples to create a flavor explosion. Here’s what you’ll need:
- Chicken Thighs (Boneless, Skinless): 2 lbs. The star of the show! Boneless, skinless thighs are perfect as they remain juicy and flavorful even when cooked at higher temperatures, and they soak up the marinade beautifully. You can also use bone-in, skin-on thighs for richer flavor, just adjust cooking time accordingly.
- Soy Sauce (Low Sodium): ½ cup. The umami backbone of the glaze. Low sodium is recommended to control the saltiness, allowing the other flavors to shine. You can use regular soy sauce, but be mindful of the salt and perhaps reduce the amount slightly, or adjust other ingredients to balance.
- Honey: ¼ cup. The natural sweetener that provides that signature glaze and sticky texture. Use a good quality honey for the best flavor – wildflower, clover, or even buckwheat honey will work wonderfully, each adding a slightly different nuance to the dish.
- Rice Vinegar: ¼ cup. Adds a crucial tanginess that cuts through the sweetness and saltiness, creating a balanced flavor profile. Apple cider vinegar can be used as a substitute if rice vinegar isn’t available, though it will have a slightly different flavor.
- Garlic (Minced): 4 cloves. Essential for adding aromatic depth and savory notes. Freshly minced garlic is always best for maximum flavor, but pre-minced garlic from a jar can be used for convenience.
- Ginger (Freshly Grated): 1 tablespoon. Provides a warm, spicy kick that complements the honey and soy beautifully. Fresh ginger is highly recommended for its vibrant flavor and aroma. If you must substitute, use ground ginger sparingly, as it has a different flavor profile.
- Sesame Oil: 1 tablespoon. Adds a nutty, fragrant aroma and flavor that is characteristic of Asian-inspired cuisine. Toasted sesame oil is preferred for its richer flavor, but regular sesame oil will also work.
- Cornstarch: 1 tablespoon. Used to thicken the glaze to that perfect sticky consistency that clings to the chicken. Arrowroot powder can be used as a gluten-free alternative.
- Water: 2 tablespoons. Helps to dissolve the cornstarch and create a smooth glaze.
- Sesame Seeds (for Garnish): Optional. Adds a visual appeal and a subtle nutty crunch to the finished dish. Toasted sesame seeds are even better for enhanced flavor.
- Green Onions (for Garnish): Optional. Provides a fresh, vibrant finish and a mild oniony bite that complements the richness of the chicken.
Instructions
Making this Honey Soy Glazed Chicken is surprisingly straightforward. Follow these step-by-step instructions for a guaranteed delicious outcome:
Step 1: Prepare the Marinade
In a medium-sized mixing bowl, whisk together the soy sauce, honey, rice vinegar, minced garlic, grated ginger, and sesame oil. Ensure all ingredients are well combined to create a homogenous and flavorful marinade. This marinade is the key to infusing the chicken with incredible flavor and creating that signature sticky glaze. Take a moment to smell the aroma – the combination of soy, honey, and ginger is already enticing! You can adjust the sweetness or saltiness at this stage if you prefer; for a sweeter glaze, add a touch more honey, and for a saltier glaze, add a pinch more soy sauce (though be mindful of over-salting).
Step 2: Marinate the Chicken
Place the boneless, skinless chicken thighs into the bowl with the marinade. Make sure each piece of chicken is fully submerged and coated in the marinade. This ensures even flavor distribution throughout the chicken. Use your hands or tongs to gently toss the chicken, ensuring every nook and cranny is covered. For the best flavor, marinate the chicken for at least 30 minutes at room temperature or, ideally, for 2-4 hours in the refrigerator. Longer marinating times allow the flavors to penetrate deeper into the chicken, resulting in a more flavorful and tender final dish. If marinating in the refrigerator, ensure the bowl is covered with plastic wrap or placed in a sealed container. Overnight marination is also possible, but be mindful that the chicken might become slightly too salty if marinated for excessively long periods due to the soy sauce.
Step 3: Preheat Oven and Prepare Baking Dish
Preheat your oven to 400°F (200°C). This temperature is ideal for baking the chicken, ensuring it cooks through while developing a beautiful glaze. While the oven is preheating, prepare a baking dish. Lightly grease a baking dish or line it with parchment paper for easier cleanup. Choose a baking dish that is just large enough to hold the chicken in a single layer, without overcrowding. Overcrowding can lead to steaming rather than baking, which can hinder browning and glaze development. If using parchment paper, ensure it extends slightly beyond the edges of the dish to act as handles for easy removal later.
Step 4: Bake the Chicken
Arrange the marinated chicken thighs in a single layer in the prepared baking dish. Pour the remaining marinade over the chicken. This extra marinade will contribute to the glaze as the chicken bakes. Place the baking dish in the preheated oven and bake for 20-25 minutes, or until the chicken is cooked through and reaches an internal temperature of 165°F (74°C). Use a meat thermometer to check the internal temperature at the thickest part of the thigh to ensure it is fully cooked. Baking time may vary depending on the thickness of the chicken thighs and your oven. During baking, you might want to baste the chicken with the pan juices once or twice to enhance the glaze and keep the chicken moist.
Step 5: Prepare the Cornstarch Slurry
While the chicken is baking, prepare the cornstarch slurry. In a small bowl, whisk together the cornstarch and water until smooth and there are no lumps. This slurry is crucial for thickening the remaining marinade into a luscious glaze. Ensure the cornstarch is fully dissolved in the water; otherwise, it might clump up when added to the hot liquid. Set the slurry aside until the chicken is almost done baking.
Step 6: Glaze the Chicken
Once the chicken is cooked through, remove the baking dish from the oven. Carefully pour the cornstarch slurry into the baking dish with the chicken and pan juices. Stir gently to combine the slurry with the pan juices. Return the baking dish to the oven and bake for another 5-7 minutes, or until the glaze has thickened and become glossy. Keep a close eye on the chicken during this stage to prevent the glaze from burning. The glaze should transform from a watery liquid to a rich, sticky, and shimmering coating. You can increase the oven temperature to broil for the last 1-2 minutes (watching very carefully!) to further caramelize the glaze and add a slightly charred, smoky flavor, but this step is optional and requires close monitoring to prevent burning.
Step 7: Rest and Garnish
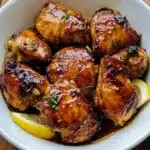
Remove the Honey Soy Glazed Chicken from the oven and let it rest for a few minutes before serving. This allows the juices to redistribute, resulting in more tender and flavorful chicken. Garnish the chicken with sesame seeds and chopped green onions for added visual appeal and a fresh, aromatic finish. The sesame seeds provide a nutty crunch, and the green onions offer a mild oniony bite that complements the rich glaze.
Step 8: Serve and Enjoy!
Serve the Honey Soy Glazed Chicken hot, alongside your favorite sides. It pairs wonderfully with rice, noodles, roasted vegetables, or a fresh salad. The sticky, savory, and sweet glaze is incredibly addictive, making this dish a guaranteed crowd-pleaser. Enjoy the delightful flavors and textures of your homemade Honey Soy Glazed Chicken!
Nutrition
- Serving Size: one normal portion
- Calories: 350
- Sodium: 500mg
- Fat: 15g
- Carbohydrates: 10g
- Protein: 35g