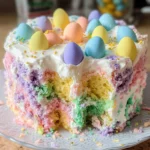
Ingredients
- Yellow Cake Mix: (1 box, 15.25 oz) – The base of our cake, providing a light and fluffy texture that perfectly soaks up the pudding. You can also use white or vanilla cake mix for a similar result.
- Eggs: (3 large) – Bind the ingredients together, adding richness and structure to the cake. Use large eggs at room temperature for best results.
- Vegetable Oil: (½ cup) – Adds moisture and tenderness to the cake, ensuring it stays soft and delicious. You can substitute with canola oil or melted coconut oil.
- Water: (1 cup) – Hydrates the cake mix and helps to create the perfect batter consistency.
- Instant Vanilla Pudding Mix: (1 box, 3.4 oz) – The secret to the “poke” in poke cake! This creates a creamy, flavorful filling that seeps into the holes, making every bite incredibly moist. Vanilla is classic, but you can experiment with other flavors like white chocolate or coconut.
- Milk: (2 cups) – Used to prepare the instant pudding, creating a smooth and pourable consistency. Whole milk will give the richest flavor, but 2% or even non-dairy milk alternatives will work.
- Whipped Topping: (1 container, 8 oz) – The light and airy frosting that blankets the cake. It’s the perfect canvas for our Easter decorations and adds a touch of sweetness without being overly heavy. Make sure it is thawed if frozen.
- Food Coloring: (Gel or liquid, assorted Easter colors) – This is where the Easter magic happens! Choose your favorite pastel shades like pink, blue, yellow, green, and purple to create vibrant swirls in the pudding. Gel food coloring is more concentrated, so start with a small amount.
- Easter Sprinkles: (Assorted shapes and colors) – The final flourish! Sprinkles add texture, visual appeal, and festive cheer. Look for Easter-themed sprinkles with bunnies, eggs, and pastel colors to complete the look.
Instructions
- Preheat Oven and Prepare Pan: Preheat your oven to 350°F (175°C). Grease and flour a 9×13 inch baking pan. Alternatively, you can use baking spray with flour for a non-stick finish. This ensures your cake releases easily after baking.
- Mix Cake Batter: In a large mixing bowl, combine the yellow cake mix, eggs, vegetable oil, and water. Beat with an electric mixer on low speed until just combined, then increase speed to medium and beat for 2 minutes. Scrape down the sides of the bowl to ensure all ingredients are fully incorporated. Do not overmix, as this can lead to a tough cake.
- Bake the Cake: Pour the batter into the prepared baking pan and spread evenly. Bake for 30-35 minutes, or until a wooden skewer inserted into the center comes out clean. The edges should be lightly golden brown, and the cake should spring back lightly when touched.
- Cool the Cake: Remove the cake from the oven and let it cool in the pan for about 15-20 minutes. This allows the cake to firm up slightly before you poke holes in it, preventing it from crumbling. It’s crucial to let it cool enough so the pudding doesn’t melt the cake excessively.
- Prepare Pudding: While the cake is cooling, prepare the instant vanilla pudding according to package directions. In a separate bowl, whisk together the instant vanilla pudding mix and milk until smooth and slightly thickened. Let it sit for a few minutes to fully set up slightly.
- Poke Holes: Once the cake has cooled slightly, use the handle of a wooden spoon or a fork to poke holes all over the surface of the cake. Make sure the holes are evenly spaced and go almost all the way down to the bottom of the pan. The more holes you poke, the more pudding will soak into the cake, resulting in a moister final product.
- Color the Pudding: Divide the prepared pudding into several small bowls, depending on how many colors you want to use. Add a few drops of food coloring to each bowl and stir until you achieve your desired pastel shades. Start with a small amount of food coloring and add more gradually to reach the perfect Easter hues.
- Pour Pudding: Carefully pour the colored pudding over the poked holes in the cake. Alternate colors for a visually appealing marbled effect. Gently spread the pudding with a spatula to ensure it seeps into all the holes and covers the entire surface of the cake. Don’t worry if it seems like a lot of pudding – the cake will absorb it.
- Frost and Decorate: Spread the thawed whipped topping evenly over the top of the pudding-soaked cake. Use a spatula or knife to create smooth swirls or peaks in the whipped topping for a decorative touch. Immediately sprinkle generously with Easter sprinkles while the whipped topping is still soft so they adhere well.
- Chill: Cover the cake with plastic wrap or foil and refrigerate for at least 2-3 hours, or preferably overnight. Chilling allows the pudding to fully set and the flavors to meld together, resulting in the best taste and texture. This step is essential for achieving the signature moistness of a poke cake.
Nutrition
- Serving Size: one normal portion
- Calories: 400
- Sugar: 50
- Sodium: 400
- Fat: 20
