From the moment I first experimented with this recipe, I knew it was something truly special. “Chocolate Fudge Dream” isn’t just a name; it’s an accurate description of the experience. My family, who are self-proclaimed chocolate aficionados, went absolutely wild for it. The first time I made it for a family gathering, I barely got a piece myself! Plates were scraped clean, and requests for the recipe started flooding in before dessert was even finished. What I love most about this recipe is the intense chocolate flavor – it’s rich, decadent, and deeply satisfying without being overly sweet. It’s a multi-layered delight, starting with a chewy brownie base, moving into a melt-in-your-mouth fudge center, and culminating in a smooth, glossy chocolate ganache. It’s the kind of dessert that lingers in your memory long after the last bite, prompting cravings and repeat baking sessions. If you are a chocolate lover, prepare to be transported to chocolate heaven. This “Chocolate Fudge Dream” is about to become your new go-to recipe for any celebration, special occasion, or just because you deserve a little bit of chocolate bliss in your life. Get ready to experience chocolate indulgence at its finest!
Ingredients: Unveiling the Chocolate Symphony
The “Chocolate Fudge Dream” is built on a foundation of quality ingredients, each playing a crucial role in creating the symphony of chocolate flavors and textures. Let’s delve into each component and understand why they are essential and how to choose the best for your dream dessert.
- For the Chewy Brownie Base:
- Unsalted Butter (1 cup, 2 sticks, melted): Melted butter provides moisture and richness to the brownie base, contributing to its chewy texture. Unsalted butter allows you to control the salt level in the recipe. Using high-quality butter will enhance the overall flavor.
- Granulated Sugar (1 cup): Granulated sugar adds sweetness and contributes to the chewy texture of the brownies. It also helps to create a slightly crackly top.
- Brown Sugar (1 cup, packed light or dark brown sugar): Brown sugar adds moisture, a molasses-like depth of flavor, and enhances the chewiness of the brownies. Light or dark brown sugar can be used; dark brown sugar will result in a slightly richer, more molasses-forward flavor. Packing the brown sugar when measuring ensures accuracy.
- Large Eggs (3): Eggs provide structure, richness, and moisture to the brownies. They bind the ingredients together and contribute to the fudgy texture. Use large eggs at room temperature for better emulsification and volume.
- Vanilla Extract (2 teaspoons, pure): Vanilla extract enhances the chocolate flavor and adds a warm, aromatic note. Use pure vanilla extract for the best flavor; imitation vanilla can be used, but the flavor will be less complex.
- All-Purpose Flour (1 cup): All-purpose flour provides structure to the brownies. Measure your flour correctly by spooning it into the measuring cup and leveling it off, rather than scooping directly from the bag, which can pack the flour and lead to drier brownies.
- Unsweetened Cocoa Powder (1/2 cup, Dutch-processed recommended): Cocoa powder is the primary source of chocolate flavor in the brownie base. Dutch-processed cocoa powder is less acidic and has a smoother, richer chocolate flavor compared to natural cocoa powder. It also results in a darker brownie. Natural unsweetened cocoa powder can be used, but the flavor profile will be slightly different.
- Salt (1/2 teaspoon): Salt enhances the flavors of all the ingredients, especially the chocolate, and balances the sweetness.
- For the Decadent Fudge Layer:
- Sweetened Condensed Milk (1 (14-ounce) can): Sweetened condensed milk is the magic ingredient that creates the incredibly rich and fudgy texture. It provides sweetness and a creamy consistency. Ensure you are using sweetened condensed milk and not evaporated milk, as they are not interchangeable.
- Semi-Sweet Chocolate Chips (2 cups): Semi-sweet chocolate chips provide a balanced chocolate flavor that is not too bitter and not too sweet, perfect for the fudge layer. High-quality semi-sweet chocolate chips will melt smoothly and contribute to a richer flavor. You can also use chopped semi-sweet chocolate baking bars.
- Unsalted Butter (1/2 cup, 1 stick): Butter adds richness, shine, and a smooth texture to the fudge layer. Unsalted butter allows you to control the salt level.
- Vanilla Extract (1 teaspoon, pure): Vanilla extract enhances the chocolate flavor in the fudge layer.
- For the Glossy Chocolate Ganache Topping:
- Heavy Cream (1 cup): Heavy cream creates the smooth and luxurious texture of the ganache. It provides richness and helps to emulsify the chocolate. Do not substitute with milk or half-and-half, as they do not have enough fat to create a proper ganache.
- Semi-Sweet Chocolate Chips (2 cups): Semi-sweet chocolate chips provide the chocolate flavor for the ganache. Using the same type of chocolate chips as in the fudge layer creates flavor harmony. Again, high-quality chocolate chips or chopped baking bars are recommended.
Ingredient Substitutions and Variations:
- Chocolate Variations: Experiment with different types of chocolate chips or chopped chocolate in the fudge layer and ganache topping. You can use milk chocolate for a sweeter flavor, dark chocolate for a more intense and bittersweet flavor, or a combination of semi-sweet and dark chocolate for a balanced profile. For a mocha twist, add a tablespoon of instant espresso powder to the ganache.
- Nutty Brownie Base: Add 1/2 cup of chopped nuts (walnuts, pecans, or almonds) to the brownie batter for added texture and flavor. Toast the nuts lightly before adding for a deeper flavor.
- Peanut Butter Swirl: Swirl peanut butter into the brownie batter or fudge layer for a delicious chocolate-peanut butter combination. Warm peanut butter slightly to make it easier to swirl.
- Mint Chocolate Dream: Add 1/2 teaspoon of peppermint extract to the brownie batter or fudge layer, and use mint chocolate chips in the fudge layer or ganache for a refreshing mint chocolate version.
- Spiced Chocolate Dream: Add 1 teaspoon of cinnamon or a pinch of cayenne pepper to the brownie batter for a warm, spiced chocolate flavor.
- Vegan Chocolate Fudge Dream: To make this recipe vegan, substitute the butter in all layers with a vegan butter alternative that is solid at room temperature and behaves similarly to dairy butter in baking. Ensure your chocolate chips are dairy-free (many dark chocolate chips are). There are also vegan sweetened condensed milk alternatives available that can be used for the fudge layer. For the eggs in the brownie layer, you can use flax eggs (1 tablespoon flaxseed meal mixed with 3 tablespoons water, let sit for 5 minutes to thicken) or a commercial egg replacer.
Instructions: Crafting Your Chocolate Masterpiece Step-by-Step
Creating the “Chocolate Fudge Dream” is a rewarding process, and these detailed instructions will guide you through each layer, ensuring a decadent and impressive dessert.
Part 1: Baking the Chewy Brownie Base
- Preheat Oven and Prepare Baking Pan: Preheat your oven to 350°F (175°C). Grease and flour a 9×13 inch baking pan. Alternatively, line the pan with parchment paper, leaving an overhang on the sides to easily lift the brownies out after baking. This makes cleanup easier and ensures the brownies don’t stick.
- Melt Butter: In a large microwave-safe bowl or in a saucepan over low heat, melt the butter completely.
- Combine Melted Butter and Sugars: Add both the granulated sugar and brown sugar to the melted butter in the bowl. Whisk together until well combined and slightly cooled. This step helps to dissolve the sugars and creates a smoother brownie batter.
- Incorporate Eggs and Vanilla: Whisk in the eggs one at a time, mixing well after each addition. Stir in the vanilla extract. The mixture should be smooth and glossy.
- Combine Dry Ingredients: In a separate medium bowl, whisk together the all-purpose flour, cocoa powder, and salt. Whisking ensures the cocoa powder is evenly distributed and prevents lumps.
- Gradually Add Dry Ingredients to Wet Ingredients: Gradually add the dry ingredients to the wet ingredients, mixing on low speed with an electric mixer or gently folding with a spatula until just combined. Be careful not to overmix; overmixing can lead to tough brownies. Mix until there are no visible streaks of flour.
- Pour Batter into Prepared Pan: Pour the brownie batter into the prepared baking pan and spread it evenly to the corners.
- Bake: Bake in the preheated oven for 25-30 minutes, or until a toothpick inserted into the center comes out with moist crumbs attached. Do not overbake, as you want the brownies to be fudgy and chewy. Start checking for doneness around 25 minutes. The edges should be set, and the center should be slightly soft.
- Cool Completely: Let the brownie base cool completely in the pan on a wire rack before adding the fudge layer. Cooling completely is crucial for the fudge layer to set properly and not melt the brownie base.
Part 2: Creating the Decadent Fudge Layer
- Combine Fudge Ingredients: In a medium saucepan, combine the sweetened condensed milk, semi-sweet chocolate chips, and butter.
- Melt and Stir: Cook over low heat, stirring constantly, until the chocolate chips and butter are completely melted and the mixture is smooth and glossy. Be careful not to overheat or scorch the chocolate. Keep the heat low and stir frequently.
- Stir in Vanilla: Remove the saucepan from the heat and stir in the vanilla extract.
- Pour Fudge Over Brownie Base: Pour the warm fudge layer evenly over the cooled brownie base in the pan. Spread it out smoothly with a spatula or offset knife.
- Chill in Refrigerator: Refrigerate the pan for at least 1 hour, or until the fudge layer is firm to the touch. Chilling allows the fudge layer to set completely and become firm enough to hold the ganache topping.
Part 3: Making the Glossy Chocolate Ganache Topping
- Heat Heavy Cream: In a small saucepan, heat the heavy cream over medium heat until it just begins to simmer around the edges. Do not boil.
- Pour Hot Cream Over Chocolate Chips: Place the semi-sweet chocolate chips in a heatproof bowl. Pour the hot heavy cream over the chocolate chips.
- Let Sit and Melt: Let the mixture sit for 1-2 minutes to allow the hot cream to melt the chocolate chips.
- Whisk Until Smooth: Whisk the mixture gently until smooth, glossy, and completely combined. The ganache should be smooth and pourable. If there are still unmelted chocolate chips, you can gently microwave the mixture in 10-second intervals, stirring after each interval, until smooth.
- Pour Ganache Over Fudge Layer: Pour the warm chocolate ganache evenly over the chilled fudge layer in the pan. Spread it out smoothly with a spatula or offset knife.
- Chill Again: Return the pan to the refrigerator and chill for at least 2 hours, or preferably overnight, to allow the ganache to set completely and the “Chocolate Fudge Dream” to firm up for easy slicing. Overnight chilling is recommended for the best texture and slicing.
Part 4: Cutting and Serving
- Lift from Pan (if using parchment paper): If you lined the pan with parchment paper, lift the entire “Chocolate Fudge Dream” out of the pan using the parchment paper overhang. Place it on a cutting board.
- Cut into Squares: Cut the “Chocolate Fudge Dream” into squares using a sharp knife. For clean cuts, you can run the knife under hot water and wipe it dry between each cut. The number of squares will depend on your desired serving size; typically, a 9×13 inch pan yields 12-16 squares.
- Serve and Enjoy: Serve chilled or at room temperature. “Chocolate Fudge Dream” is delicious on its own or with your favorite toppings (see “How to Serve” section for suggestions).
Tips for Success:
- Use Quality Chocolate: The quality of your chocolate chips or baking chocolate directly impacts the flavor of the dessert. Use good-quality chocolate for the best results.
- Don’t Overbake Brownies: Overbaked brownies will be dry and cakey rather than fudgy and chewy. Bake until a toothpick inserted into the center comes out with moist crumbs attached.
- Chill Thoroughly: Chilling each layer and the final dessert is crucial for proper setting and easy slicing. Don’t rush the chilling process.
- Smooth Layers: Use a spatula or offset knife to spread each layer evenly and smoothly for a professional-looking finish.
- Warm Knife for Clean Cuts: For clean, sharp cuts, run your knife under hot water and wipe it dry between each cut, especially when cutting through the ganache and fudge layers.
Nutrition Facts: Indulge Responsibly
“Chocolate Fudge Dream” is a decadent treat, and while it’s incredibly delicious, it’s important to be aware of the nutritional content, especially if you’re mindful of your calorie intake or sugar consumption. Please note that these are estimated values and can vary based on specific ingredients and serving sizes.
- Servings: Approximately 16 servings (based on cutting into 4×4 squares from a 9×13 inch pan).
- Calories per Serving (estimated): 450-550 calories.
Approximate Nutritional Breakdown per Serving (estimated):
- Calories: 450-550 kcal
- Total Fat: 25-35g
- Saturated Fat: 15-20g
- Unsaturated Fat: 8-12g
Important Considerations:
- High in Calories and Sugar: “Chocolate Fudge Dream” is a rich dessert and is high in calories, fat, and sugar. It should be enjoyed in moderation as an occasional treat.
- Fat Content: The dessert contains a significant amount of fat, primarily from butter, chocolate, and heavy cream. While some fats are necessary for a balanced diet, saturated fat should be consumed in moderation.
- Sugar Content: The sugar content is also high due to the granulated sugar, brown sugar, sweetened condensed milk, and chocolate. Excessive sugar intake can contribute to various health issues.
- Portion Control is Key: Due to its richness and calorie density, portion control is particularly important when enjoying “Chocolate Fudge Dream.” A smaller square can still be satisfying.
Disclaimer: These nutritional facts are estimates and should be used as a general guideline. For precise nutritional information, you can use online nutrition calculators and input the specific brands and quantities of ingredients you use. Always consult with a registered dietitian or healthcare professional for personalized dietary advice. “Chocolate Fudge Dream” is intended as an indulgent dessert and not a health food.
Preparation Time: Plan for Chocolate Bliss
While the “Chocolate Fudge Dream” is not overly complicated, it does involve multiple steps and chilling times. Planning ahead will ensure a smooth baking process and allow you to enjoy the delicious results.
- Prep Time: 30-40 minutes (This includes melting butter, mixing brownie batter, making fudge layer, and ganache).
- Bake Time: 25-30 minutes
- Chill Time: Minimum 3-4 hours (1 hour for fudge layer, 2 hours for ganache, ideally overnight for best texture and slicing)
- Total Time: Approximately 4-5 hours (including chilling time, but mostly hands-off chilling). Plan for overnight chilling for optimal results.
Time Breakdown:
- Brownie Base Prep and Baking: 45-55 minutes (including prep and baking)
- Fudge Layer Prep: 15 minutes
- Fudge Layer Chilling: 1 hour (minimum)
- Ganache Prep: 15 minutes
- Ganache Chilling: 2 hours (minimum, overnight recommended)
- Cutting and Serving: 10 minutes
Tips to Manage Time:
- Make Components in Stages: You can bake the brownie base one day, make the fudge layer the next day, and then the ganache and final chilling on the third day, breaking up the process if needed.
- Bake Brownies Ahead: Bake the brownie base ahead of time (up to 2 days in advance) and store it tightly wrapped at room temperature. Make the fudge and ganache layers closer to serving time.
- Weekend Baking Project: “Chocolate Fudge Dream” is a great weekend baking project where you can spread out the steps over a Saturday and have it ready to enjoy on Sunday or for the week ahead.
- Chilling Overnight is Best: While minimum chilling times are provided, chilling overnight (especially after adding the ganache) is highly recommended for the best texture, flavor melding, and easiest slicing.
While the total time may seem long, remember that most of it is hands-off chilling time. The active preparation time is manageable, and the reward is well worth the effort for this truly dreamy chocolate dessert.
How to Serve: Elevating the Chocolate Experience
“Chocolate Fudge Dream” is intensely satisfying on its own, but there are many ways to enhance the serving experience and create a truly memorable dessert presentation. Here are some delightful serving suggestions:
- Classic Chilled Squares: The most straightforward and delicious way to serve is simply chilled, cut into squares. The coldness enhances the fudgy texture and intensifies the chocolate flavors.
- With Vanilla Ice Cream: A scoop of creamy vanilla ice cream provides a wonderful contrast in temperature and texture to the rich, cold fudge. The vanilla flavor complements the deep chocolate perfectly.
- Whipped Cream or Crème Fraîche: A dollop of lightly sweetened whipped cream or tangy crème fraîche adds a touch of lightness and creamy coolness, cutting through the richness of the chocolate.
- Fresh Berries: Serve with a side of fresh raspberries or strawberries. The tartness of the berries provides a beautiful balance to the intense chocolate sweetness.
- Chocolate Sauce Drizzle: For extra chocolate indulgence, drizzle warm chocolate sauce or hot fudge sauce over the squares just before serving.
- Caramel Sauce Swirl: A swirl of salted caramel sauce adds a salty-sweet dimension and a beautiful visual element.
- Espresso or Coffee Pairing: Serve alongside a strong cup of espresso or coffee. The bitterness of the coffee complements the sweetness of the chocolate and creates a sophisticated pairing.
- Dusting of Cocoa Powder or Powdered Sugar: A light dusting of unsweetened cocoa powder or powdered sugar adds a touch of elegance and visual appeal.
- Chopped Nuts Garnish: Sprinkle chopped toasted nuts (walnuts, pecans, or almonds) on top for added texture and nutty flavor.
- Mint Sprig Decoration: A fresh mint sprig adds a pop of green color and a hint of freshness.
Serving Occasions:
- Special Occasions: Perfect for birthday parties, anniversaries, holiday gatherings, and any celebration where you want to impress with a decadent chocolate dessert.
- Dessert Buffets: A standout addition to dessert buffets, offering a rich and intensely chocolate option.
- Potlucks and Parties: Travels well chilled and is a crowd-pleasing dessert to bring to potlucks or parties.
- After-Dinner Indulgence: A sophisticated and satisfying dessert to serve after a special dinner.
- Chocolate Lover’s Treat: Anytime you or someone you know needs a serious chocolate fix, “Chocolate Fudge Dream” is the answer.
No matter how you choose to serve it, “Chocolate Fudge Dream” is guaranteed to be a chocolate lover’s delight. Get creative with toppings and pairings to customize the experience and make it your own.
Additional Tips: Perfecting Your Chocolate Fudge Dream
To ensure your “Chocolate Fudge Dream” is a flawless and unforgettable dessert every time, here are five additional tips and tricks to elevate your baking game:
- Room Temperature Eggs: Using room temperature eggs for the brownie base helps them emulsify better into the batter, resulting in a smoother and more cohesive brownie. If you forgot to take eggs out of the refrigerator, you can quickly warm them by placing them in a bowl of warm (not hot) water for 5-10 minutes.
- Don’t Overmix Brownie Batter: Overmixing brownie batter develops the gluten in the flour, which can lead to tough, cakey brownies instead of fudgy, chewy ones. Mix the dry ingredients into the wet ingredients until just combined, and stop mixing as soon as you see no more streaks of flour. A few lumps are okay.
- Parchment Paper for Easy Removal: Lining your baking pan with parchment paper, with an overhang on the sides, is highly recommended. This makes it incredibly easy to lift the entire “Chocolate Fudge Dream” out of the pan after chilling, making cutting and serving much simpler and cleaner.
- Chill Completely Before Cutting: Resist the urge to cut into the “Chocolate Fudge Dream” before it has been properly chilled. Thorough chilling is essential for the fudge and ganache layers to set firmly, allowing for clean, even cuts. Overnight chilling is ideal for the best texture and slicing.
- Warm Knife for Clean Cuts: For professional-looking, clean cuts, especially through the chilled fudge and ganache layers, run your knife under hot water for a few seconds, wipe it dry, and then make your cut. Repeat this process between each cut to maintain clean edges.
FAQ: Your Chocolate Fudge Dream Questions Answered
Have questions about making the ultimate “Chocolate Fudge Dream”? Here are answers to some frequently asked questions to help you bake with confidence and troubleshoot any potential issues:
Q1: Can I use natural cocoa powder instead of Dutch-processed cocoa powder?
A: Yes, you can use natural unsweetened cocoa powder if you don’t have Dutch-processed cocoa powder. However, Dutch-processed cocoa powder is recommended for a smoother, richer chocolate flavor and a darker brownie color. Natural cocoa powder is more acidic and may result in a slightly lighter color and tangier flavor. The difference will be subtle, but for the most decadent chocolate flavor, Dutch-processed is preferred.
Q2: My fudge layer is not setting, what did I do wrong?
A: The most common reason for a fudge layer not setting is not chilling it for long enough. Ensure you chill the fudge layer for at least 1 hour in the refrigerator, or until it is firm to the touch, before adding the ganache. If it’s still not setting after adequate chilling, it could be due to ingredient ratios. Double-check that you used sweetened condensed milk (not evaporated milk) and the correct amounts of chocolate and butter.
Q3: Can I make the ganache ahead of time?
A: Yes, you can make the chocolate ganache ahead of time. Once made, let it cool slightly at room temperature, then cover it tightly with plastic wrap, pressing the plastic wrap directly onto the surface of the ganache to prevent a skin from forming. Store it at room temperature for a few hours or in the refrigerator for up to 2-3 days. If refrigerated, the ganache will become firm. Before pouring it over the fudge layer, gently reheat it in the microwave in short intervals or over a double boiler, stirring until smooth and pourable again.
Q4: Can I freeze “Chocolate Fudge Dream”?
A: Yes, “Chocolate Fudge Dream” freezes well. Cut it into squares, then wrap each square individually in plastic wrap and place them in an airtight freezer-safe container. Freeze for up to 2-3 months. Thaw in the refrigerator overnight or at room temperature for about 30-60 minutes before serving. Freezing can slightly alter the texture of the ganache, but it will still be delicious.
Q5: Can I double the recipe?
A: Yes, you can easily double the recipe to make a larger batch. If doubling, bake the brownie base in a larger 11×17 inch baking pan or two 9×13 inch pans. The baking time for the brownie base may need to be slightly adjusted (add a few minutes) if using a larger pan. The fudge and ganache layer ingredients should also be doubled accordingly. Ensure you have enough refrigerator space for chilling a larger pan or multiple pans.
Print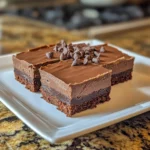
Chocolate Fudge Dream
Ingredients
The “Chocolate Fudge Dream” is built on a foundation of quality ingredients, each playing a crucial role in creating the symphony of chocolate flavors and textures. Let’s delve into each component and understand why they are essential and how to choose the best for your dream dessert.
- For the Chewy Brownie Base:
- Unsalted Butter (1 cup, 2 sticks, melted): Melted butter provides moisture and richness to the brownie base, contributing to its chewy texture. Unsalted butter allows you to control the salt level in the recipe. Using high-quality butter will enhance the overall flavor.
- Granulated Sugar (1 cup): Granulated sugar adds sweetness and contributes to the chewy texture of the brownies. It also helps to create a slightly crackly top.
- Brown Sugar (1 cup, packed light or dark brown sugar): Brown sugar adds moisture, a molasses-like depth of flavor, and enhances the chewiness of the brownies. Light or dark brown sugar can be used; dark brown sugar will result in a slightly richer, more molasses-forward flavor. Packing the brown sugar when measuring ensures accuracy.
- Large Eggs (3): Eggs provide structure, richness, and moisture to the brownies. They bind the ingredients together and contribute to the fudgy texture. Use large eggs at room temperature for better emulsification and volume.
- Vanilla Extract (2 teaspoons, pure): Vanilla extract enhances the chocolate flavor and adds a warm, aromatic note. Use pure vanilla extract for the best flavor; imitation vanilla can be used, but the flavor will be less complex.
- All-Purpose Flour (1 cup): All-purpose flour provides structure to the brownies. Measure your flour correctly by spooning it into the measuring cup and leveling it off, rather than scooping directly from the bag, which can pack the flour and lead to drier brownies.
- Unsweetened Cocoa Powder (1/2 cup, Dutch-processed recommended): Cocoa powder is the primary source of chocolate flavor in the brownie base. Dutch-processed cocoa powder is less acidic and has a smoother, richer chocolate flavor compared to natural cocoa powder. It also results in a darker brownie. Natural unsweetened cocoa powder can be used, but the flavor profile will be slightly different.
- Salt (1/2 teaspoon): Salt enhances the flavors of all the ingredients, especially the chocolate, and balances the sweetness.
- For the Decadent Fudge Layer:
- Sweetened Condensed Milk (1 (14-ounce) can): Sweetened condensed milk is the magic ingredient that creates the incredibly rich and fudgy texture. It provides sweetness and a creamy consistency. Ensure you are using sweetened condensed milk and not evaporated milk, as they are not interchangeable.
- Semi-Sweet Chocolate Chips (2 cups): Semi-sweet chocolate chips provide a balanced chocolate flavor that is not too bitter and not too sweet, perfect for the fudge layer. High-quality semi-sweet chocolate chips will melt smoothly and contribute to a richer flavor. You can also use chopped semi-sweet chocolate baking bars.
- Unsalted Butter (1/2 cup, 1 stick): Butter adds richness, shine, and a smooth texture to the fudge layer. Unsalted butter allows you to control the salt level.
- Vanilla Extract (1 teaspoon, pure): Vanilla extract enhances the chocolate flavor in the fudge layer.
- For the Glossy Chocolate Ganache Topping:
- Heavy Cream (1 cup): Heavy cream creates the smooth and luxurious texture of the ganache. It provides richness and helps to emulsify the chocolate. Do not substitute with milk or half-and-half, as they do not have enough fat to create a proper ganache.
- Semi-Sweet Chocolate Chips (2 cups): Semi-sweet chocolate chips provide the chocolate flavor for the ganache. Using the same type of chocolate chips as in the fudge layer creates flavor harmony. Again, high-quality chocolate chips or chopped baking bars are recommended.
Ingredient Substitutions and Variations:
- Chocolate Variations: Experiment with different types of chocolate chips or chopped chocolate in the fudge layer and ganache topping. You can use milk chocolate for a sweeter flavor, dark chocolate for a more intense and bittersweet flavor, or a combination of semi-sweet and dark chocolate for a balanced profile. For a mocha twist, add a tablespoon of instant espresso powder to the ganache.
- Nutty Brownie Base: Add 1/2 cup of chopped nuts (walnuts, pecans, or almonds) to the brownie batter for added texture and flavor. Toast the nuts lightly before adding for a deeper flavor.
- Peanut Butter Swirl: Swirl peanut butter into the brownie batter or fudge layer for a delicious chocolate-peanut butter combination. Warm peanut butter slightly to make it easier to swirl.
- Mint Chocolate Dream: Add 1/2 teaspoon of peppermint extract to the brownie batter or fudge layer, and use mint chocolate chips in the fudge layer or ganache for a refreshing mint chocolate version.
- Spiced Chocolate Dream: Add 1 teaspoon of cinnamon or a pinch of cayenne pepper to the brownie batter for a warm, spiced chocolate flavor.
- Vegan Chocolate Fudge Dream: To make this recipe vegan, substitute the butter in all layers with a vegan butter alternative that is solid at room temperature and behaves similarly to dairy butter in baking. Ensure your chocolate chips are dairy-free (many dark chocolate chips are). There are also vegan sweetened condensed milk alternatives available that can be used for the fudge layer. For the eggs in the brownie layer, you can use flax eggs (1 tablespoon flaxseed meal mixed with 3 tablespoons water, let sit for 5 minutes to thicken) or a commercial egg replacer.
Instructions
Creating the “Chocolate Fudge Dream” is a rewarding process, and these detailed instructions will guide you through each layer, ensuring a decadent and impressive dessert.
Part 1: Baking the Chewy Brownie Base
- Preheat Oven and Prepare Baking Pan: Preheat your oven to 350°F (175°C). Grease and flour a 9×13 inch baking pan. Alternatively, line the pan with parchment paper, leaving an overhang on the sides to easily lift the brownies out after baking. This makes cleanup easier and ensures the brownies don’t stick.
- Melt Butter: In a large microwave-safe bowl or in a saucepan over low heat, melt the butter completely.
- Combine Melted Butter and Sugars: Add both the granulated sugar and brown sugar to the melted butter in the bowl. Whisk together until well combined and slightly cooled. This step helps to dissolve the sugars and creates a smoother brownie batter.
- Incorporate Eggs and Vanilla: Whisk in the eggs one at a time, mixing well after each addition. Stir in the vanilla extract. The mixture should be smooth and glossy.
- Combine Dry Ingredients: In a separate medium bowl, whisk together the all-purpose flour, cocoa powder, and salt. Whisking ensures the cocoa powder is evenly distributed and prevents lumps.
- Gradually Add Dry Ingredients to Wet Ingredients: Gradually add the dry ingredients to the wet ingredients, mixing on low speed with an electric mixer or gently folding with a spatula until just combined. Be careful not to overmix; overmixing can lead to tough brownies. Mix until there are no visible streaks of flour.
- Pour Batter into Prepared Pan: Pour the brownie batter into the prepared baking pan and spread it evenly to the corners.
- Bake: Bake in the preheated oven for 25-30 minutes, or until a toothpick inserted into the center comes out with moist crumbs attached. Do not overbake, as you want the brownies to be fudgy and chewy. Start checking for doneness around 25 minutes. The edges should be set, and the center should be slightly soft.
- Cool Completely: Let the brownie base cool completely in the pan on a wire rack before adding the fudge layer. Cooling completely is crucial for the fudge layer to set properly and not melt the brownie base.
Part 2: Creating the Decadent Fudge Layer
- Combine Fudge Ingredients: In a medium saucepan, combine the sweetened condensed milk, semi-sweet chocolate chips, and butter.
- Melt and Stir: Cook over low heat, stirring constantly, until the chocolate chips and butter are completely melted and the mixture is smooth and glossy. Be careful not to overheat or scorch the chocolate. Keep the heat low and stir frequently.
- Stir in Vanilla: Remove the saucepan from the heat and stir in the vanilla extract.
- Pour Fudge Over Brownie Base: Pour the warm fudge layer evenly over the cooled brownie base in the pan. Spread it out smoothly with a spatula or offset knife.
- Chill in Refrigerator: Refrigerate the pan for at least 1 hour, or until the fudge layer is firm to the touch. Chilling allows the fudge layer to set completely and become firm enough to hold the ganache topping.
Part 3: Making the Glossy Chocolate Ganache Topping
- Heat Heavy Cream: In a small saucepan, heat the heavy cream over medium heat until it just begins to simmer around the edges. Do not boil.
- Pour Hot Cream Over Chocolate Chips: Place the semi-sweet chocolate chips in a heatproof bowl. Pour the hot heavy cream over the chocolate chips.
- Let Sit and Melt: Let the mixture sit for 1-2 minutes to allow the hot cream to melt the chocolate chips.
- Whisk Until Smooth: Whisk the mixture gently until smooth, glossy, and completely combined. The ganache should be smooth and pourable. If there are still unmelted chocolate chips, you can gently microwave the mixture in 10-second intervals, stirring after each interval, until smooth.
- Pour Ganache Over Fudge Layer: Pour the warm chocolate ganache evenly over the chilled fudge layer in the pan. Spread it out smoothly with a spatula or offset knife.
- Chill Again: Return the pan to the refrigerator and chill for at least 2 hours, or preferably overnight, to allow the ganache to set completely and the “Chocolate Fudge Dream” to firm up for easy slicing. Overnight chilling is recommended for the best texture and slicing.
Part 4: Cutting and Serving
- Lift from Pan (if using parchment paper): If you lined the pan with parchment paper, lift the entire “Chocolate Fudge Dream” out of the pan using the parchment paper overhang. Place it on a cutting board.
- Cut into Squares: Cut the “Chocolate Fudge Dream” into squares using a sharp knife. For clean cuts, you can run the knife under hot water and wipe it dry between each cut. The number of squares will depend on your desired serving size; typically, a 9×13 inch pan yields 12-16 squares.
- Serve and Enjoy: Serve chilled or at room temperature. “Chocolate Fudge Dream” is delicious on its own or with your favorite toppings (see “How to Serve” section for suggestions).
Tips for Success:
- Use Quality Chocolate: The quality of your chocolate chips or baking chocolate directly impacts the flavor of the dessert. Use good-quality chocolate for the best results.
- Don’t Overbake Brownies: Overbaked brownies will be dry and cakey rather than fudgy and chewy. Bake until a toothpick inserted into the center comes out with moist crumbs attached.
- Chill Thoroughly: Chilling each layer and the final dessert is crucial for proper setting and easy slicing. Don’t rush the chilling process.
- Smooth Layers: Use a spatula or offset knife to spread each layer evenly and smoothly for a professional-looking finish.
- Warm Knife for Clean Cuts: For clean, sharp cuts, run your knife under hot water and wipe it dry between each cut, especially when cutting through the ganache and fudge layers.
Nutrition
- Serving Size: one normal portion
- Calories: 550
- Fat: 35g