Of all the recipes that have become a permanent fixture in my kitchen’s weekly rotation, this Creamy Cauliflower Chickpea Curry holds a special place. I first made it on a whim one chilly Tuesday evening, craving something that was both deeply comforting and genuinely nourishing. I wasn’t sure how the family would react—curry can sometimes be a tough sell for picky eaters. But as the fragrant aroma of toasted spices, ginger, and garlic began to weave its way through the house, I saw curious faces start to peek into the kitchen. The final verdict? An overwhelming success. My husband, who usually prefers meat-centric dishes, went back for a second helping, and even my youngest, after some initial hesitation, was scooping up the creamy, coconut-rich sauce with torn pieces of naan bread. It was a moment of pure culinary victory. This dish proved that plant-based eating doesn’t mean sacrificing flavor or satisfaction. It’s a bowl of warmth, a hug from the inside out, and it’s become our go-to meal for busy weeknights, lazy Sundays, and everything in between. It’s incredibly simple to make, yet the result is a curry so rich, layered, and delicious, it tastes like it came from a top-tier Indian restaurant. Now, I’m thrilled to share this beloved recipe with you, hoping it brings as much warmth and joy to your table as it has to mine.
Ingredients
- 1 tbsp Coconut Oil or Vegetable Oil: This is the base for sautéing your aromatics; coconut oil adds a subtle sweetness that complements the curry.
- 1 large Yellow Onion, finely diced: Forms the sweet, savory foundation of the curry sauce.
- 3 cloves Garlic, minced: An essential aromatic that provides a pungent, savory depth.
- 1 inch Ginger, freshly grated: Adds a warm, zesty, and slightly spicy kick that brightens the entire dish.
- 1 tbsp Curry Powder: A foundational blend of spices; choose a high-quality mild or medium powder.
- 1 tsp Turmeric Powder: Provides a beautiful golden color and an earthy, slightly bitter flavor with powerful anti-inflammatory properties.
- 1 tsp Ground Cumin: Lends a warm, nutty, and slightly peppery flavor crucial for any good curry.
- 1/2 tsp Ground Coriander: Adds a mild, citrusy, and slightly sweet note that balances the earthier spices.
- 1/4 tsp Cayenne Pepper or Red Chili Flakes (optional): Adjust this to your preferred heat level. You can omit it for a very mild curry or add more for a fiery kick.
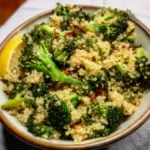
- 1 large head of Cauliflower (about 2 lbs), cut into bite-sized florets: The star of the dish, it becomes wonderfully tender and soaks up the flavorful sauce.
- 1 (15-ounce) can of Chickpeas (Garbanzo Beans), rinsed and drained: Adds a hearty, plant-based protein and a satisfying, slightly firm texture.
- 1 (14-ounce) can of Full-Fat Coconut Milk: This is the secret to an incredibly creamy, rich, and luscious sauce. Do not substitute with light coconut milk if you want maximum creaminess.
- 1 (14-ounce) can of Diced or Crushed Tomatoes, undrained: Lends acidity, sweetness, and body to the curry sauce, balancing the richness of the coconut milk.
- 1 cup Vegetable Broth or Water: Used to adjust the consistency of the curry to your liking.
- 1 tbsp Tomato Paste: Provides a concentrated, umami-rich tomato flavor that deepens the sauce.
- 1 tsp Garam Masala: A finishing spice blend that is added at the end of cooking to provide a final burst of warm, fragrant aroma.
- Salt and freshly ground Black Pepper to taste: Essential for seasoning and bringing all the flavors together.
- Juice of 1/2 Lime: A squeeze of fresh lime juice at the end brightens up all the flavors and cuts through the richness.
- Fresh Cilantro, chopped, for garnish: Adds a final touch of fresh, herbaceous flavor and color.
Instructions
- Build the Flavor Base: Place a large pot, Dutch oven, or deep skillet over medium heat. Add the coconut oil and let it melt until it shimmers. Add the finely diced yellow onion and a pinch of salt. Sauté for 5-7 minutes, stirring occasionally, until the onions have softened and become translucent. The goal here is to sweat the onions, releasing their sweetness without browning them too much. This initial step is crucial for creating a deep, savory foundation for your curry.
- Add the Aromatics: Add the minced garlic and grated ginger to the pot with the onions. Stir continuously for about 1-2 minutes until they become highly fragrant. Be careful not to burn the garlic, as it can turn bitter. This step infuses the oil with the pungent, zesty flavors that are characteristic of a great curry.
- Bloom the Spices: Add the curry powder, turmeric, ground cumin, ground coriander, and the optional cayenne pepper to the pot. Stir constantly for about 60 seconds. This process, known as “blooming,” toasts the spices in the hot oil, which awakens their essential oils and intensifies their flavor and aroma significantly. Your kitchen should start to smell absolutely incredible at this stage.
- Incorporate the Tomato Base: Stir in the tomato paste and cook for another minute, allowing it to caramelize slightly, which deepens its flavor. Then, pour in the can of diced or crushed tomatoes (with their juices). Use your spoon to scrape up any browned bits of spice or onion from the bottom of the pot—this is called deglazing and adds a ton of flavor to the sauce.
- Simmer the Sauce: Add the full-fat coconut milk and vegetable broth to the pot. Whisk everything together until the sauce is smooth and well combined. Bring the mixture to a gentle simmer, then reduce the heat to low. Let the sauce simmer gently for about 10 minutes, uncovered, to allow the flavors to meld and deepen.
- Cook the Cauliflower: Add the bite-sized cauliflower florets and the rinsed and drained chickpeas to the simmering sauce. Stir well to ensure everything is coated. Cover the pot, and let it cook for 15-20 minutes, or until the cauliflower is fork-tender. The exact time will depend on the size of your florets. Check for doneness by piercing a piece of cauliflower with a fork; it should go in with little resistance but not be mushy.
- Finishing Touches: Once the cauliflower is tender, turn off the heat. Stir in the garam masala and the fresh lime juice. The garam masala is added at the end to preserve its delicate, aromatic compounds, while the lime juice brightens and lifts all the rich, savory flavors.
- Season and Rest: Taste the curry and season generously with salt and freshly ground black pepper until the flavors pop. Don’t be shy with the salt; it’s essential for bringing all the complex spices to life. Let the curry rest for 5-10 minutes off the heat. This allows the flavors to settle and meld even further before serving.
- Garnish and Serve: Ladle the hot curry into bowls. Garnish generously with fresh, chopped cilantro. Serve immediately and enjoy the creamy, flavorful masterpiece you’ve just created.
Nutrition Facts
- Servings: 6
- Calories per Serving: Approximately 430 kcal
This dish is a powerhouse of balanced nutrition, offering a satisfying meal that fuels your body.
- High in Fiber (Approx. 10g per serving): The combination of cauliflower and chickpeas provides a substantial amount of dietary fiber, which is crucial for digestive health, promoting feelings of fullness, and helping to regulate blood sugar levels.
- Excellent Source of Plant-Based Protein (Approx. 12g per serving): Chickpeas are a fantastic source of protein, making this dish a satisfying and muscle-supporting option for vegetarians, vegans, and anyone looking to incorporate more plant-based meals into their diet.
- Rich in Healthy Fats (Approx. 25g per serving): The full-fat coconut milk contributes healthy medium-chain triglycerides (MCTs), which are easily digestible and can provide a quick source of energy.
- Loaded with Vitamin C: Cauliflower is an incredible source of Vitamin C, a powerful antioxidant that supports the immune system, skin health, and the body’s ability to repair tissues.
- Packed with Anti-Inflammatory Spices: Turmeric, ginger, and garlic are renowned for their potent anti-inflammatory and antioxidant properties, making this curry not just delicious but also beneficial for overall wellness.
Preparation Time
This recipe is perfectly suited for a weeknight dinner, as it comes together with minimal fuss and impressive results.
- Prep Time: 15 minutes (This includes dicing the onion, mincing the garlic, grating the ginger, and chopping the cauliflower.)
- Cook Time: 35-40 minutes
- Total Time: Approximately 50-55 minutes
From start to finish, you can have a restaurant-quality, deeply flavorful curry on the table in under an hour, making it an ideal choice for a wholesome and satisfying meal without spending hours in the kitchen.
How to Serve
This cauliflower chickpea curry is incredibly versatile and can be served in a variety of delicious ways. Here are some of our favorite combinations to create a full, satisfying meal:
- With Steamed Grains:
- Basmati Rice: The classic choice. The long, fragrant grains are perfect for soaking up every last drop of the creamy sauce.
- Jasmine Rice: A slightly stickier and aromatic alternative to basmati.
- Brown Rice or Quinoa: For a healthier, whole-grain option that adds extra fiber and a nutty flavor.
- Cauliflower Rice: For a fantastic low-carb, grain-free option.
- With Breads for Dipping:
- Warm Naan Bread: Buttery, soft naan (plain, garlic, or Peshwari) is the ultimate vessel for scooping up the curry.
- Roti or Chapati: A simple, unleavened whole-wheat flatbread that is a staple in Indian cuisine.
- Toasted Pita Bread: A readily available option that works wonderfully for dipping.
- With Flavorful Toppings and Garnishes:
- Fresh Herbs: A generous sprinkle of chopped fresh cilantro or mint adds a burst of freshness.
- A Cooling Dollop: A spoonful of plain yogurt or a vegan alternative like coconut yogurt helps to balance the spices and add extra creaminess.
- A Squeeze of Citrus: An extra wedge of lime or lemon on the side allows everyone to brighten their bowl to their liking.
- Crunchy Elements: Toasted cashews, slivered almonds, or pumpkin seeds add a delightful textural contrast.
- Extra Heat: Thinly sliced red chilies or a drizzle of chili oil for those who like it spicy.
- Crispy Onions: A sprinkle of store-bought or homemade crispy fried onions on top adds a savory, crunchy finish.
Additional Tips
To help you perfect this curry and make it your own, here are eight additional tips for success:
- Roast the Cauliflower First: For a deeper, nuttier flavor and a firmer texture, toss the cauliflower florets with a tablespoon of oil and a pinch of salt, spread them on a baking sheet, and roast at 400°F (200°C) for 15-20 minutes until lightly browned. Add the roasted cauliflower to the curry during the last 5 minutes of simmering.
- Master Your Spice Level: This recipe is a template. If you prefer a very mild curry, omit the cayenne pepper entirely and ensure your curry powder is mild. For a spicier version, increase the cayenne, add a finely chopped fresh green chili (like a serrano or jalapeño) with the onions, or finish with a swirl of chili garlic oil.
- Make it Even Creamier: While full-fat coconut milk provides fantastic creaminess, you can take it to the next level. For an ultra-luxurious sauce, stir in a few tablespoons of cashew cream (soaked and blended cashews) or a large spoonful of ground almonds at the end of cooking.
- Boost the Greens: This curry is a wonderful canvas for adding more vegetables. Stir in a few large handfuls of fresh spinach or kale during the last 5 minutes of cooking and let it wilt into the sauce for an extra dose of nutrients. Frozen peas or edamame can also be added with the cauliflower.
- Perfect for Meal Prep: This curry tastes even better the next day as the flavors have more time to meld. You can make a large batch on Sunday and enjoy it for lunches or quick dinners throughout the week. Store it in an airtight container in the refrigerator.
- Freezing Instructions: This curry freezes beautifully. Let it cool completely, then transfer it to freezer-safe containers or bags. It can be frozen for up to 3 months. To reheat, let it thaw overnight in the refrigerator and then gently warm it on the stovetop, adding a splash of water or broth to loosen the sauce if needed.
- Don’t Skip the Finishing Touches: The final additions of garam masala and fresh lime juice are not optional; they are essential. The garam masala adds a complex, warm aroma, while the lime juice cuts through the richness and makes all the other flavors sing. It’s the difference between a good curry and a great one.
- Use Fresh vs. Canned Chickpeas: If you have the time, cooking your own chickpeas from scratch will result in a superior texture and flavor. However, high-quality canned chickpeas are a fantastic and convenient option. Just be sure to rinse them well to remove the canning liquid and excess sodium.
FAQ Section
Here are answers to some frequently asked questions about making this Cauliflower Chickpea Curry.
1. Can I make this curry without coconut milk?
Yes, you can. For a creamy alternative, you can create a cashew cream by soaking 1/2 cup of raw cashews in hot water for 30 minutes, then blending them with 1 cup of fresh water until completely smooth. Stir this in at the end of cooking. For a non-vegan option, you can use heavy cream or plain full-fat yogurt, but be sure to stir it in off the heat to prevent curdling.
2. Is this recipe gluten-free?
Absolutely! This recipe is naturally gluten-free. All the core ingredients (vegetables, spices, coconut milk) are gluten-free. Just ensure that your vegetable broth and any specific spice blends you use are certified gluten-free, as some may contain anti-caking agents or additives with gluten.
3. My curry is too watery. How can I thicken it?
If your curry is thinner than you’d like, you can easily thicken it. The simplest method is to let it simmer for an extra 10-15 minutes with the lid off to allow some of the liquid to evaporate. Alternatively, you can make a cornstarch slurry by mixing 1 tablespoon of cornstarch with 2 tablespoons of cold water until smooth, then stirring it into the simmering curry. Let it cook for another minute or two until it has thickened.
4. Can I use frozen cauliflower for this recipe?
Yes, frozen cauliflower is a great time-saving option. There’s no need to thaw it first. You can add the frozen florets directly to the pot. You may need to add 5-10 minutes to the cooking time to ensure they become tender. Keep in mind that frozen cauliflower can release more water, so you might need to simmer the curry a bit longer to reach your desired consistency.
5. What is the difference between curry powder and garam masala?
Curry powder is a blend of spices that is cooked into the dish from the beginning to form the flavor base. It typically includes turmeric, cumin, coriander, and fenugreek. Garam masala is an aromatic finishing blend of “warming” spices like cinnamon, cloves, cardamom, and black pepper. It is added at the very end of cooking to provide a final burst of fragrance and warmth, as its delicate flavors can be lost during a long cooking process.
6. How do I store leftovers and how long will they last?
Leftover curry can be stored in an airtight container in the refrigerator for up to 4-5 days. In fact, the flavors often deepen and improve by the second day. Reheat gently on the stovetop over low heat, adding a splash of water or vegetable broth if the sauce has thickened too much. You can also reheat it in the microwave.
7. Can I add other proteins to this curry?
Certainly. This recipe is very adaptable. For another plant-based option, you could add cubed firm or extra-firm tofu (pan-fry it first for the best texture) or a cup of red lentils (add them with the broth, as they will need liquid to cook). For a non-vegetarian option, you could add cooked shredded chicken or pan-seared shrimp toward the end of cooking.
8. My curry tastes a bit flat. What did I do wrong?
If your curry tastes flat, it almost always comes down to seasoning and acidity. First, be sure you have added enough salt. Salt is a flavor enhancer and is crucial for making the spices pop. Add a little at a time and taste until it’s just right. Second, don’t forget the final squeeze of fresh lime juice. The acidity brightens everything up and cuts through the richness, preventing the dish from tasting heavy or one-dimensional

Cauliflower Chickpea Curry
- Total Time: 55 minutes
Ingredients
- 1 tbsp Coconut Oil or Vegetable Oil: This is the base for sautéing your aromatics; coconut oil adds a subtle sweetness that complements the curry.
- 1 large Yellow Onion, finely diced: Forms the sweet, savory foundation of the curry sauce.
- 3 cloves Garlic, minced: An essential aromatic that provides a pungent, savory depth.
- 1 inch Ginger, freshly grated: Adds a warm, zesty, and slightly spicy kick that brightens the entire dish.
- 1 tbsp Curry Powder: A foundational blend of spices; choose a high-quality mild or medium powder.
- 1 tsp Turmeric Powder: Provides a beautiful golden color and an earthy, slightly bitter flavor with powerful anti-inflammatory properties.
- 1 tsp Ground Cumin: Lends a warm, nutty, and slightly peppery flavor crucial for any good curry.
- 1/2 tsp Ground Coriander: Adds a mild, citrusy, and slightly sweet note that balances the earthier spices.
- 1/4 tsp Cayenne Pepper or Red Chili Flakes (optional): Adjust this to your preferred heat level. You can omit it for a very mild curry or add more for a fiery kick.
- 1 large head of Cauliflower (about 2 lbs), cut into bite-sized florets: The star of the dish, it becomes wonderfully tender and soaks up the flavorful sauce.
- 1 (15-ounce) can of Chickpeas (Garbanzo Beans), rinsed and drained: Adds a hearty, plant-based protein and a satisfying, slightly firm texture.
- 1 (14-ounce) can of Full-Fat Coconut Milk: This is the secret to an incredibly creamy, rich, and luscious sauce. Do not substitute with light coconut milk if you want maximum creaminess.
- 1 (14-ounce) can of Diced or Crushed Tomatoes, undrained: Lends acidity, sweetness, and body to the curry sauce, balancing the richness of the coconut milk.
- 1 cup Vegetable Broth or Water: Used to adjust the consistency of the curry to your liking.
- 1 tbsp Tomato Paste: Provides a concentrated, umami-rich tomato flavor that deepens the sauce.
- 1 tsp Garam Masala: A finishing spice blend that is added at the end of cooking to provide a final burst of warm, fragrant aroma.
- Salt and freshly ground Black Pepper to taste: Essential for seasoning and bringing all the flavors together.
- Juice of 1/2 Lime: A squeeze of fresh lime juice at the end brightens up all the flavors and cuts through the richness.
- Fresh Cilantro, chopped, for garnish: Adds a final touch of fresh, herbaceous flavor and color.
Instructions
- Build the Flavor Base: Place a large pot, Dutch oven, or deep skillet over medium heat. Add the coconut oil and let it melt until it shimmers. Add the finely diced yellow onion and a pinch of salt. Sauté for 5-7 minutes, stirring occasionally, until the onions have softened and become translucent. The goal here is to sweat the onions, releasing their sweetness without browning them too much. This initial step is crucial for creating a deep, savory foundation for your curry.
- Add the Aromatics: Add the minced garlic and grated ginger to the pot with the onions. Stir continuously for about 1-2 minutes until they become highly fragrant. Be careful not to burn the garlic, as it can turn bitter. This step infuses the oil with the pungent, zesty flavors that are characteristic of a great curry.
- Bloom the Spices: Add the curry powder, turmeric, ground cumin, ground coriander, and the optional cayenne pepper to the pot. Stir constantly for about 60 seconds. This process, known as “blooming,” toasts the spices in the hot oil, which awakens their essential oils and intensifies their flavor and aroma significantly. Your kitchen should start to smell absolutely incredible at this stage.
- Incorporate the Tomato Base: Stir in the tomato paste and cook for another minute, allowing it to caramelize slightly, which deepens its flavor. Then, pour in the can of diced or crushed tomatoes (with their juices). Use your spoon to scrape up any browned bits of spice or onion from the bottom of the pot—this is called deglazing and adds a ton of flavor to the sauce.
- Simmer the Sauce: Add the full-fat coconut milk and vegetable broth to the pot. Whisk everything together until the sauce is smooth and well combined. Bring the mixture to a gentle simmer, then reduce the heat to low. Let the sauce simmer gently for about 10 minutes, uncovered, to allow the flavors to meld and deepen.
- Cook the Cauliflower: Add the bite-sized cauliflower florets and the rinsed and drained chickpeas to the simmering sauce. Stir well to ensure everything is coated. Cover the pot, and let it cook for 15-20 minutes, or until the cauliflower is fork-tender. The exact time will depend on the size of your florets. Check for doneness by piercing a piece of cauliflower with a fork; it should go in with little resistance but not be mushy.
- Finishing Touches: Once the cauliflower is tender, turn off the heat. Stir in the garam masala and the fresh lime juice. The garam masala is added at the end to preserve its delicate, aromatic compounds, while the lime juice brightens and lifts all the rich, savory flavors.
- Season and Rest: Taste the curry and season generously with salt and freshly ground black pepper until the flavors pop. Don’t be shy with the salt; it’s essential for bringing all the complex spices to life. Let the curry rest for 5-10 minutes off the heat. This allows the flavors to settle and meld even further before serving.
- Garnish and Serve: Ladle the hot curry into bowls. Garnish generously with fresh, chopped cilantro. Serve immediately and enjoy the creamy, flavorful masterpiece you’ve just created.
- Prep Time: 15 minutes
- Cook Time: 40 minutes
Nutrition
- Serving Size: one normal portion
- Calories: 430
- Fat: 25g
- Fiber: 10g
- Protein: 12g